Chess Board
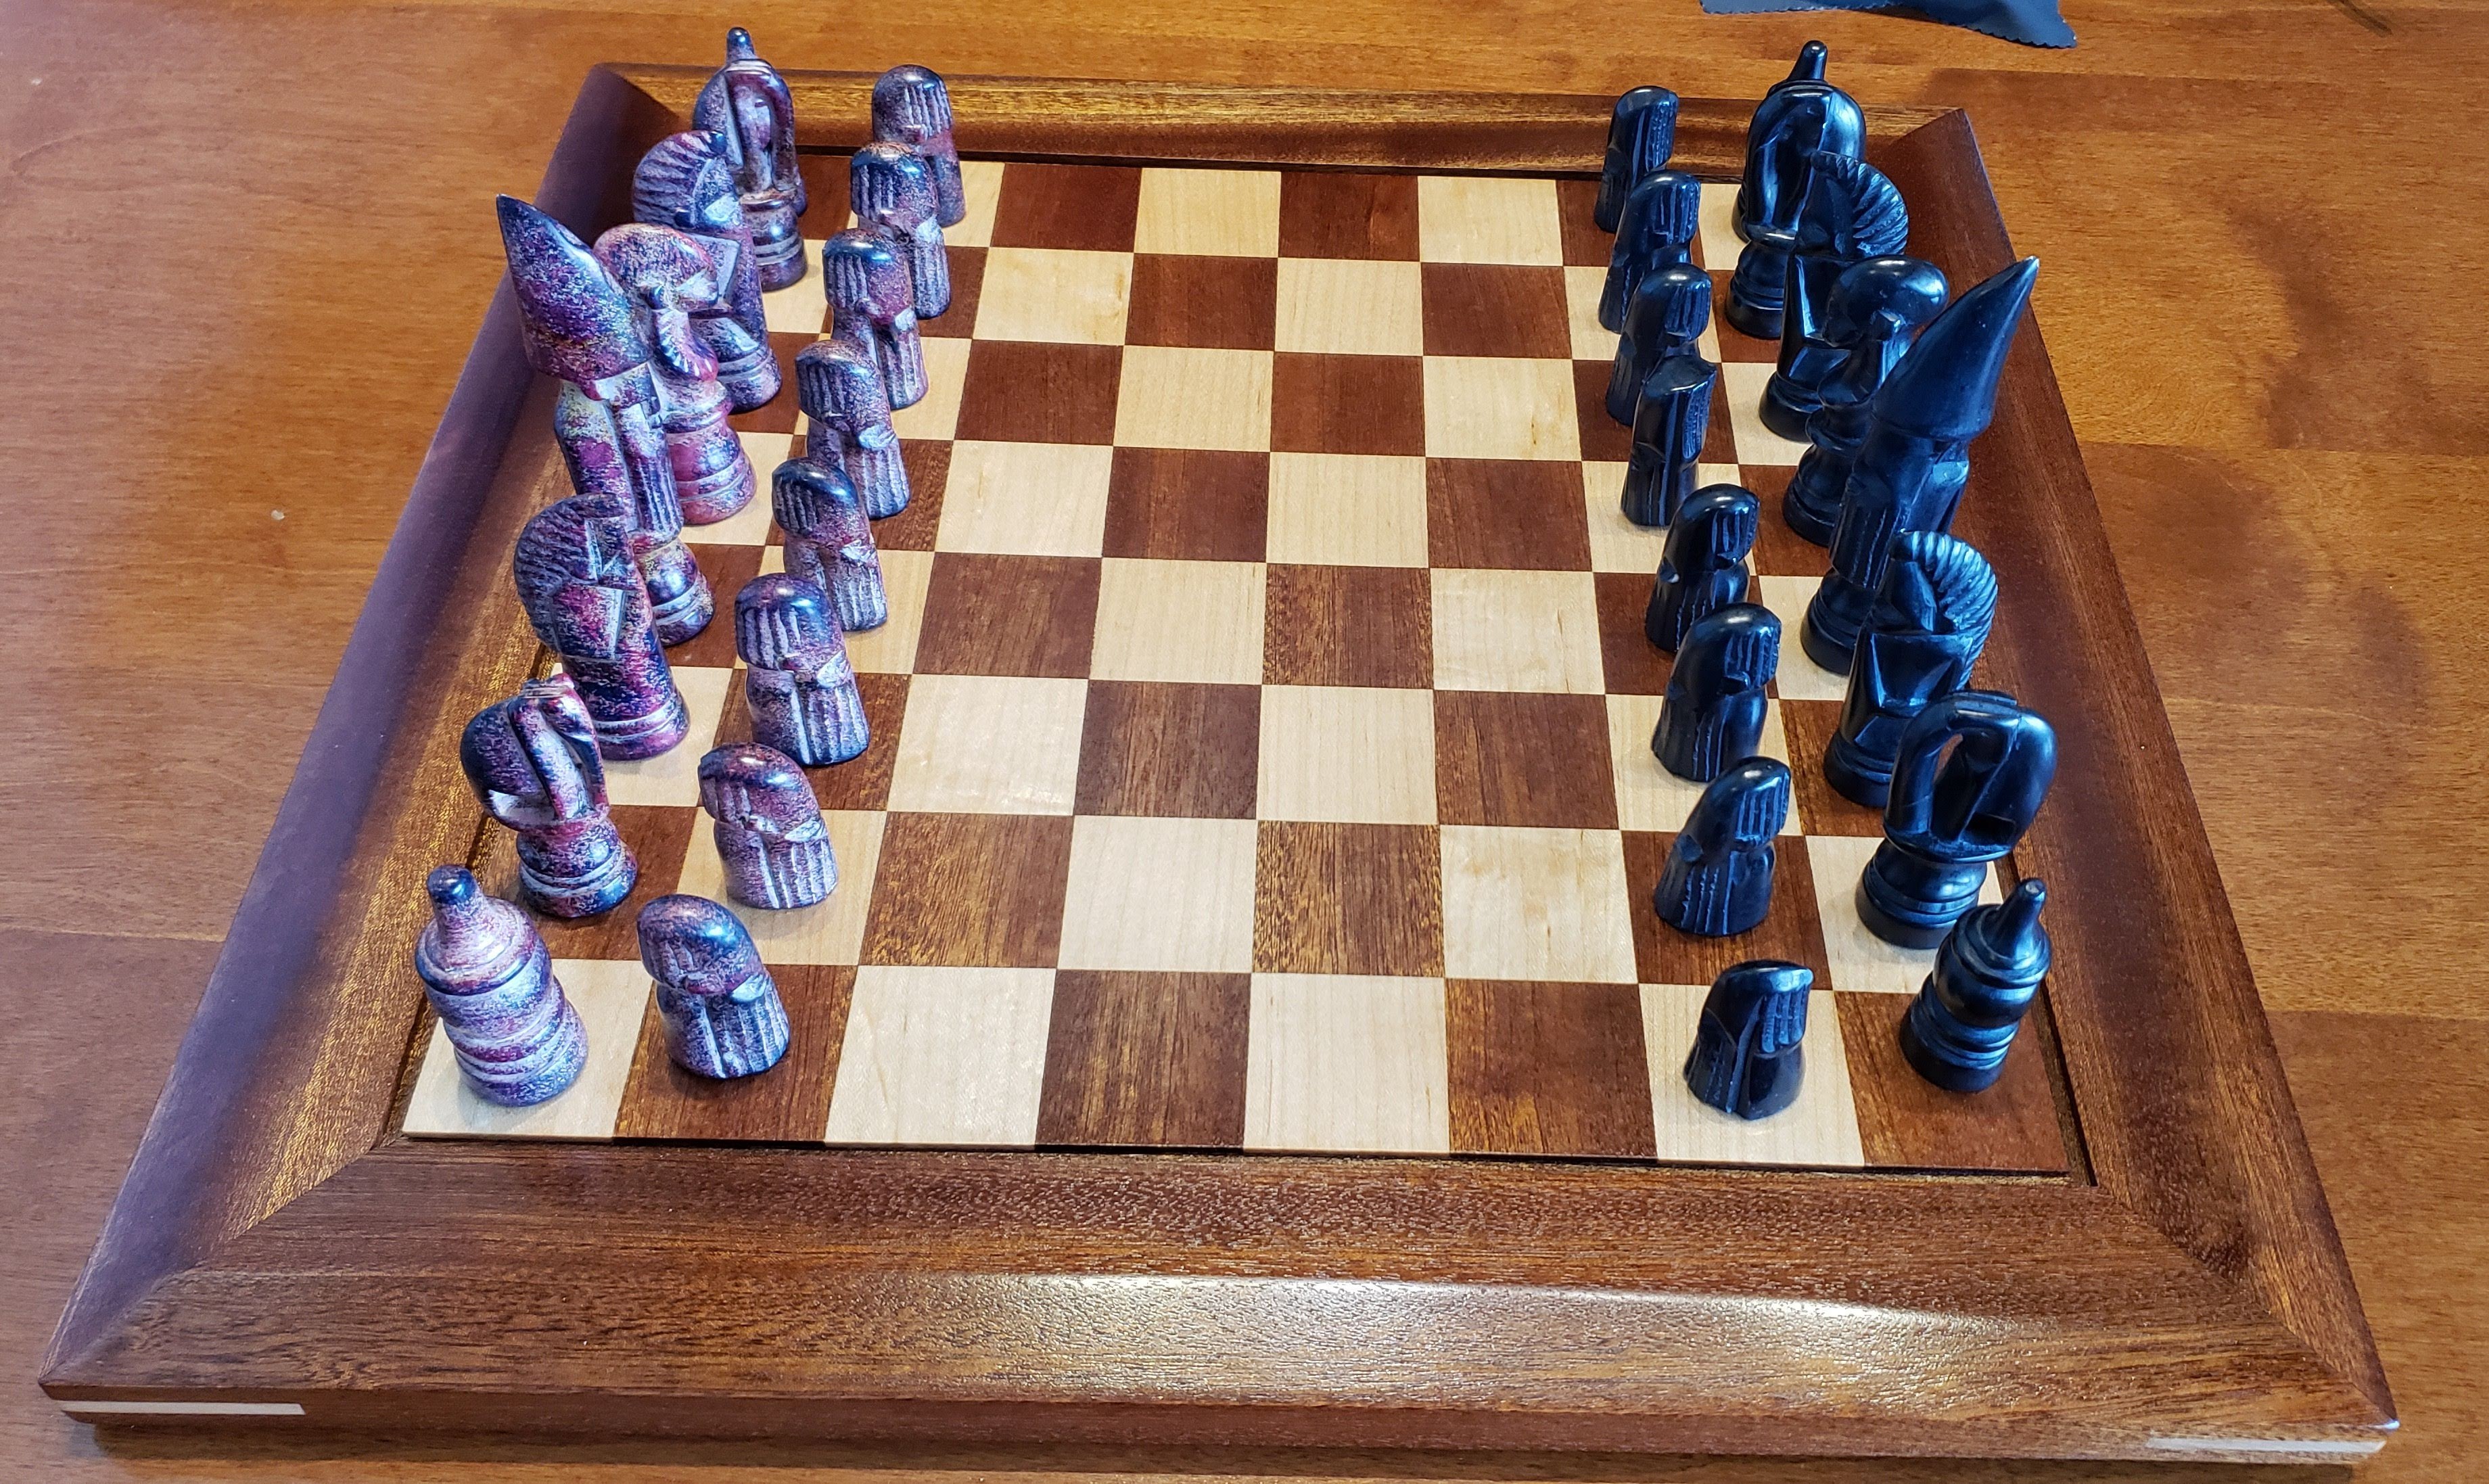
I have a chess set that was given to me by our oldest daughter’s first babysitter (Danielle). Danielle and her family were all family friends. She would come over sometimes, and we would play chess. One summer her family went on a trip to Kenya, and Danielle (who was maybe 14 at the time) came back with gifts for each member of our family. For me she brought back a beautiful hand carved stone chess set. The set also included a stone chess board. Several years after that, we moved from FL to MN, and then six years later we moved from MN to PA. Somehow in the move from MN to PA, the chess board got lost. Julie and I were both positive we put it carefully in the bottom of the cedar chest where it would be safe. When we got to PA, it wasn’t there. We have no idea what happened, but that beautiful board is no longer available to use with those hand carved pieces. I have played with my son, but the only chess board we have that is large enough to use with the pieces is a fold up cardboard Super Mario chess board. It just feels wrong to use those pieces on that board! I have wanted to build a chess board that was worthy of those pieces for a while, and I finally did so.
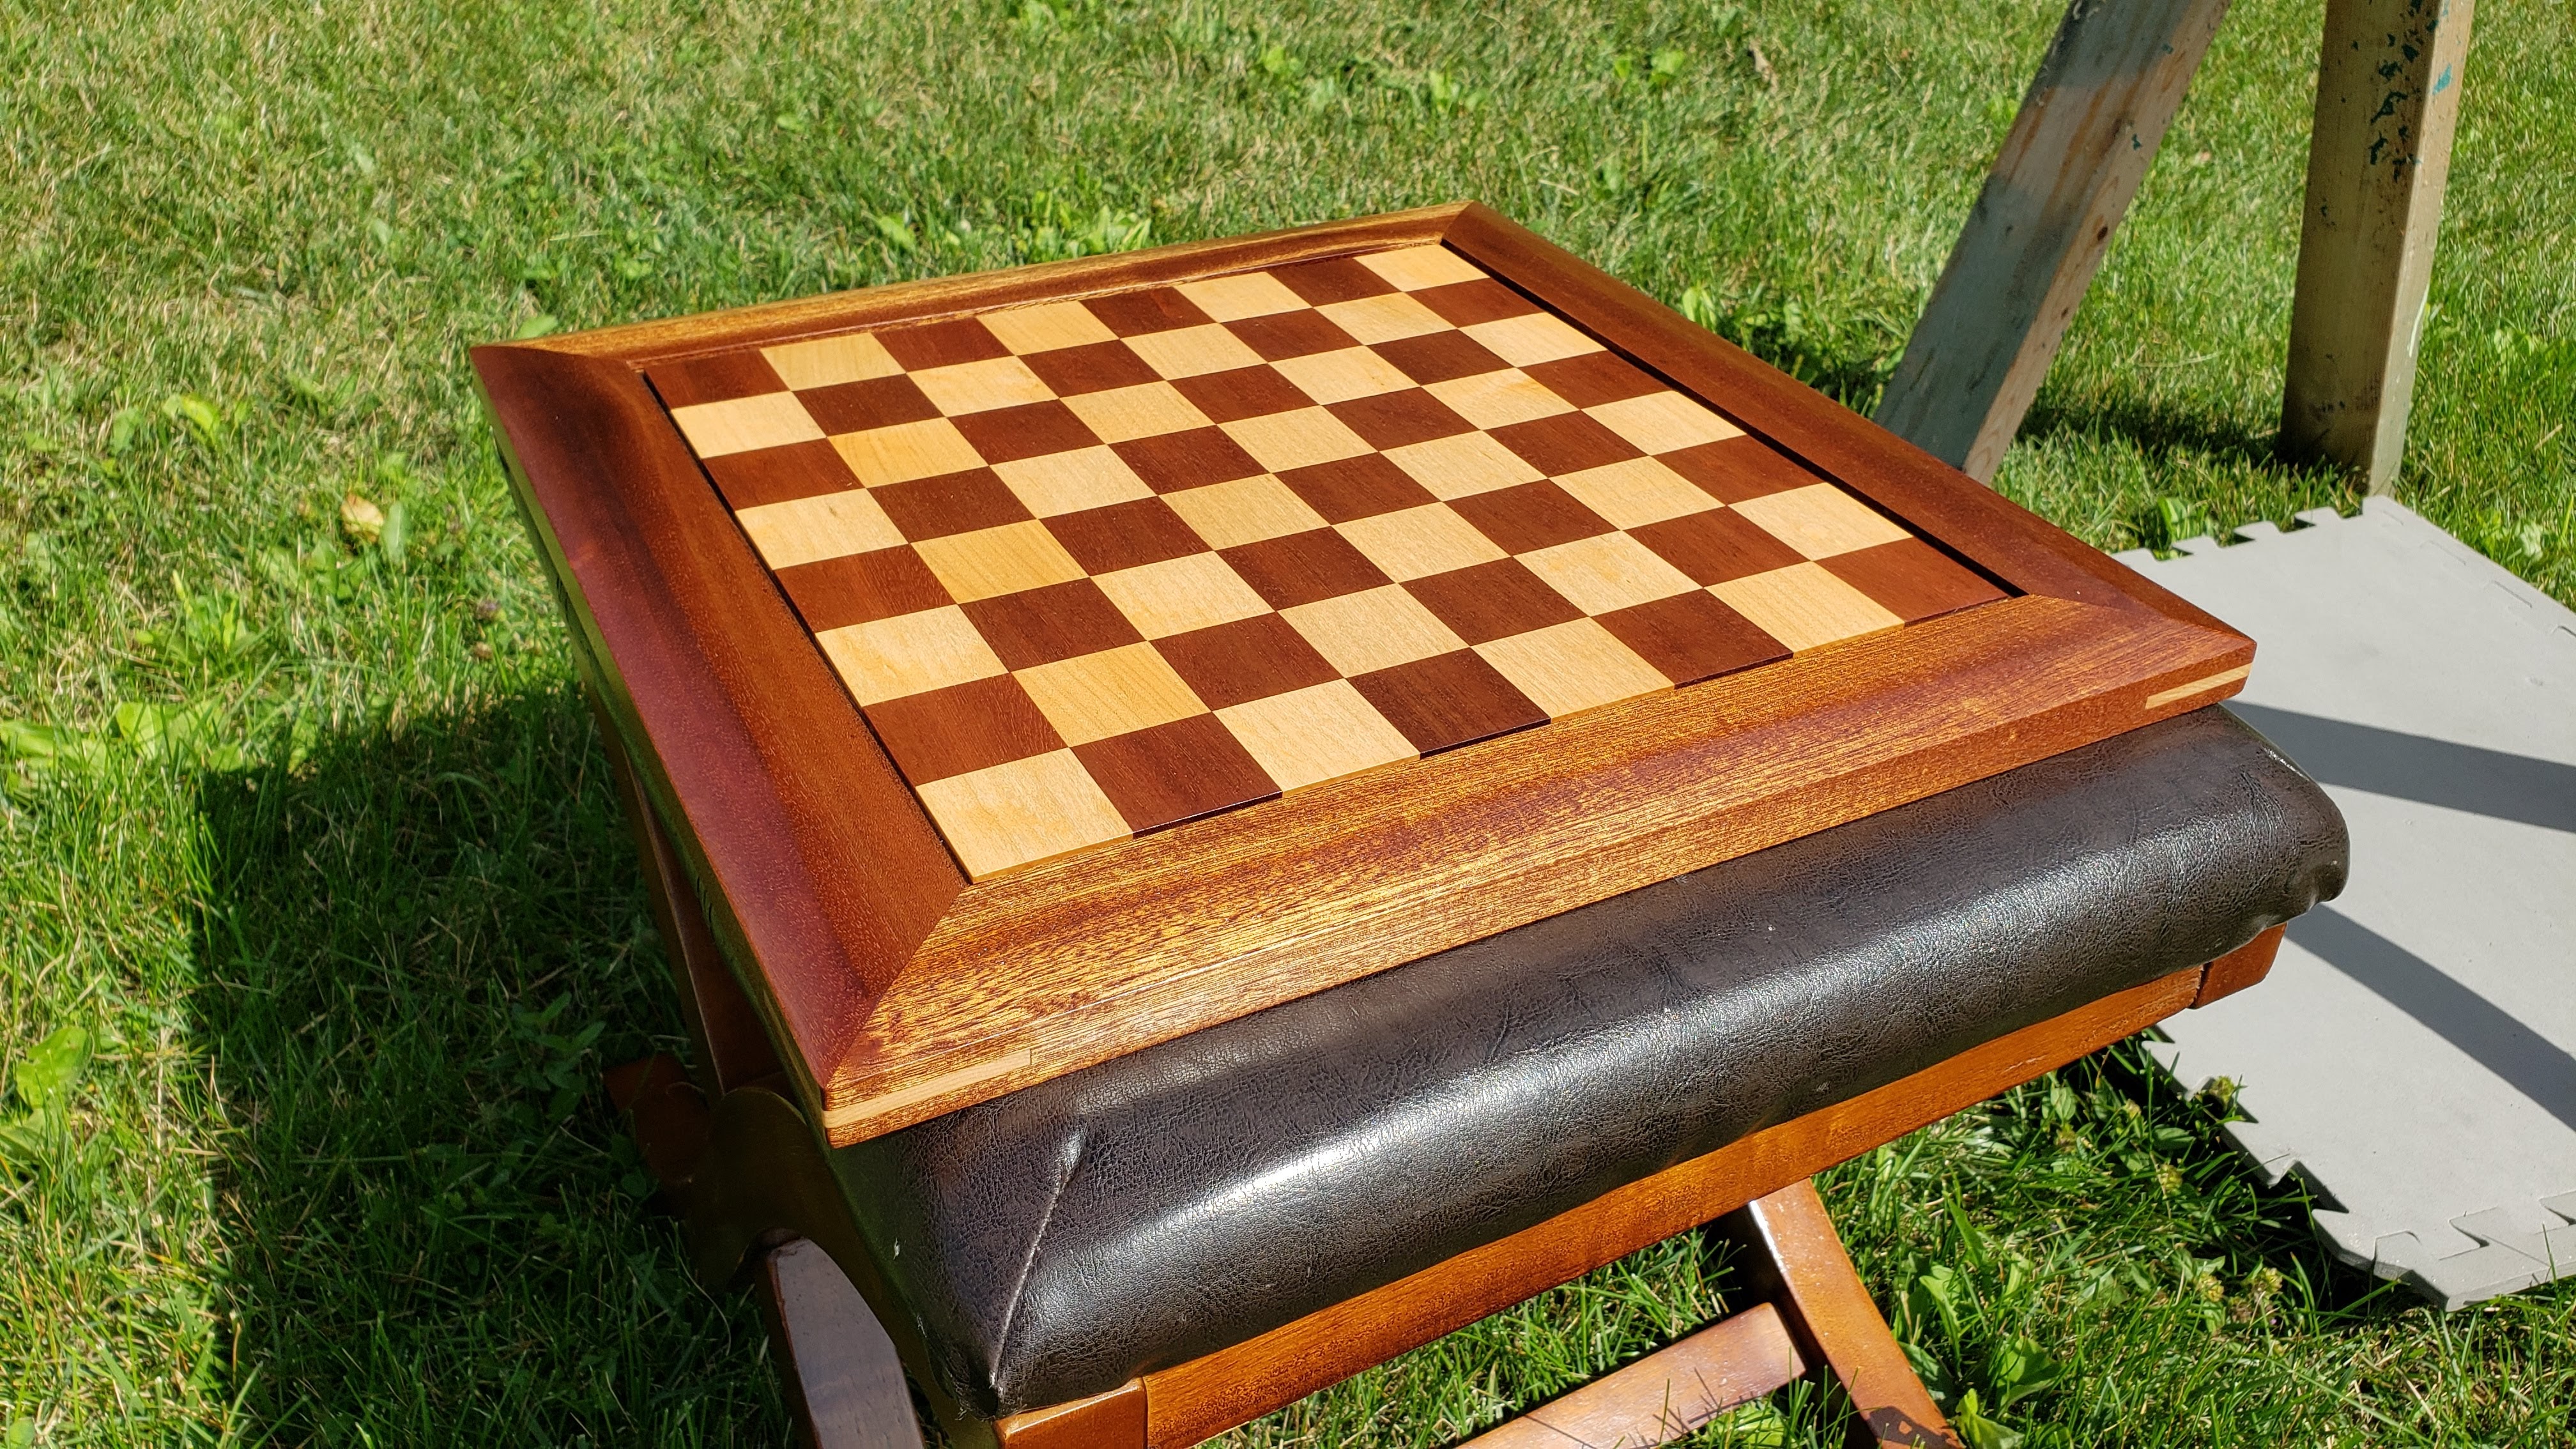
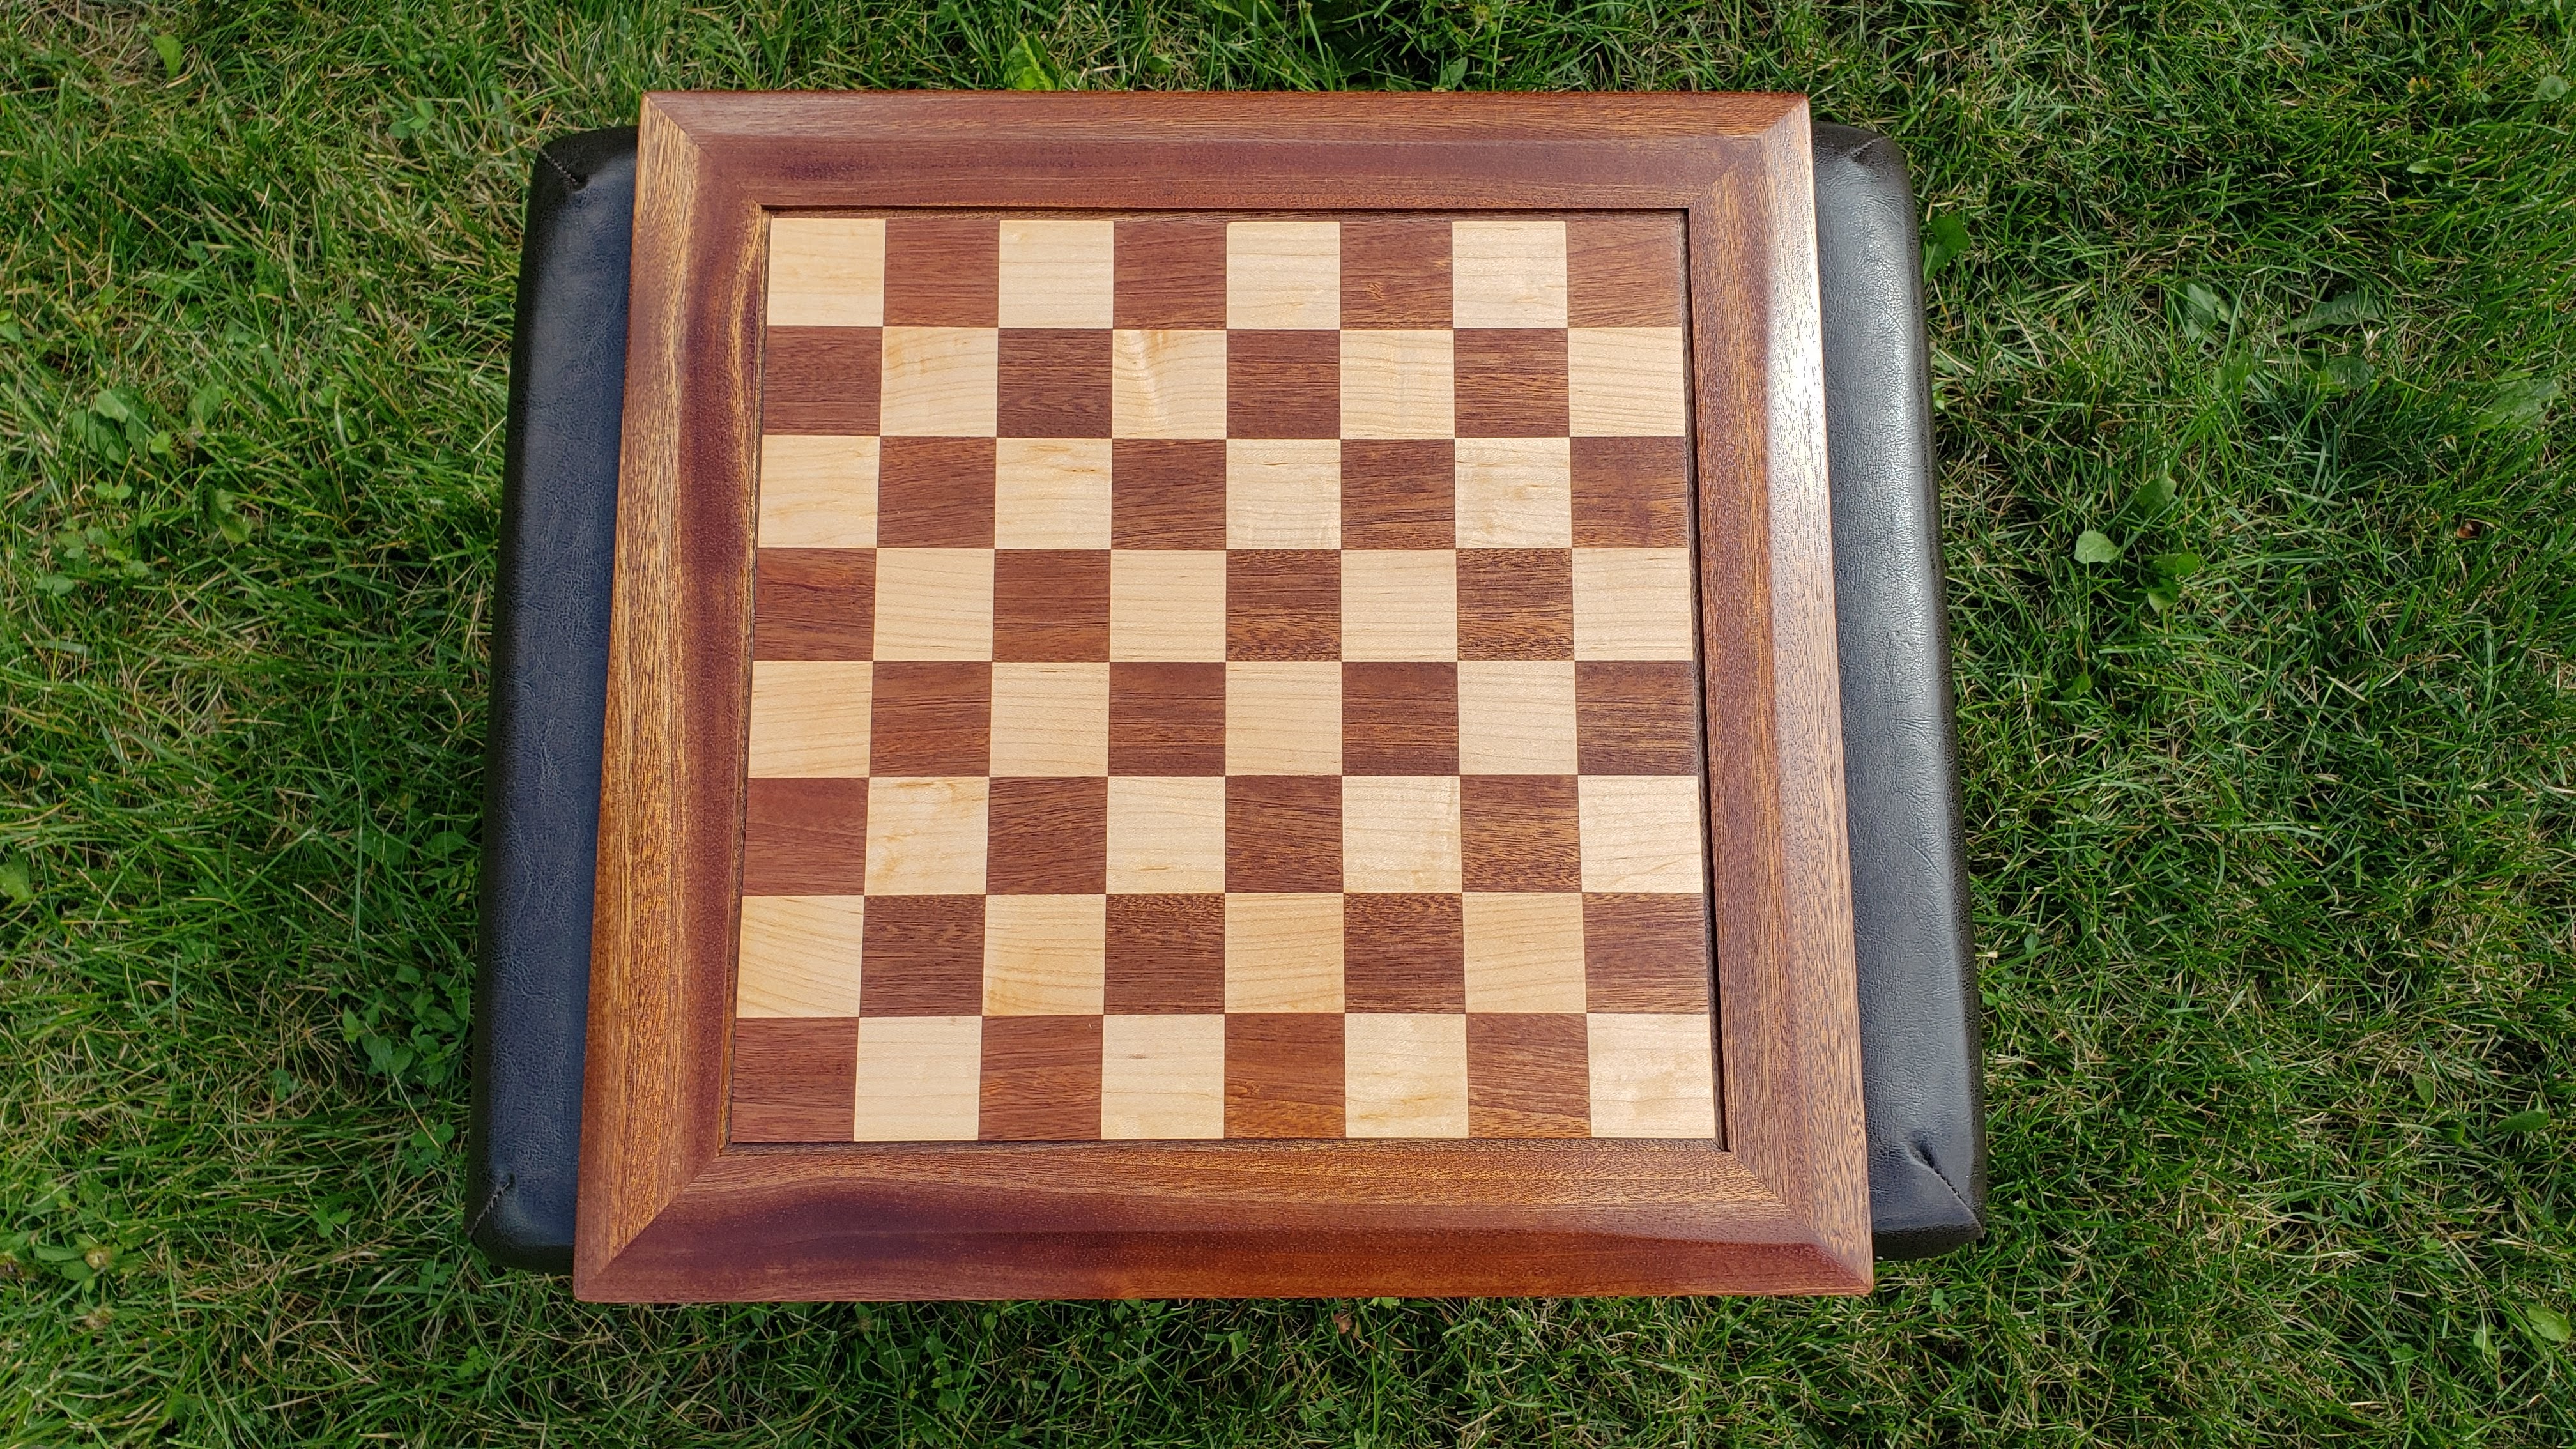
When I used the sapele to make the urn for my friend Kerry, I knew that I wanted to use that wood on the chess board also. I looked at a lot of pictures of chess boards to get ideas for how I wanted to design it. I also watched a number of YouTube videos to understand what I needed to take into account with regards to wood movement. The result is a sapele and maple board. It has maple corner splines, and all edges of the frame are beveled (top and bottom) at 10 degrees. The playing field itself is just under 1/8 inch thick and is glued to 3/4 inch birch plywood. The bottom side of the plywood has a layer of 1/8 inch thick maple to counterbalance any potential wood movement of the top. The frame is also sapele. Info on the build process is below the video.
The Build Process
The first step was to glue up strips of maple and sapele, then cut that into strips across the grain. I knew I wanted the squares to be right around 1.75 inches based on the size of the pieces. I thought I had cut the strips long enough that I would have around an inch of scrap left over. I was getting concerned as I got closer to cutting the last strip…ended up only having 7/64 of an inch of scrap left on one of them. What I didn’t include pictures of was that before I could make the first cut on this, I had to make sure that my table saw sled was perfectly square. I’ve used that sled hard the last few years, and it wasn’t perfectly square when I checked it. So…I built a new front fence for the sled and used the five cut method to square it up to within .001 inch of square.
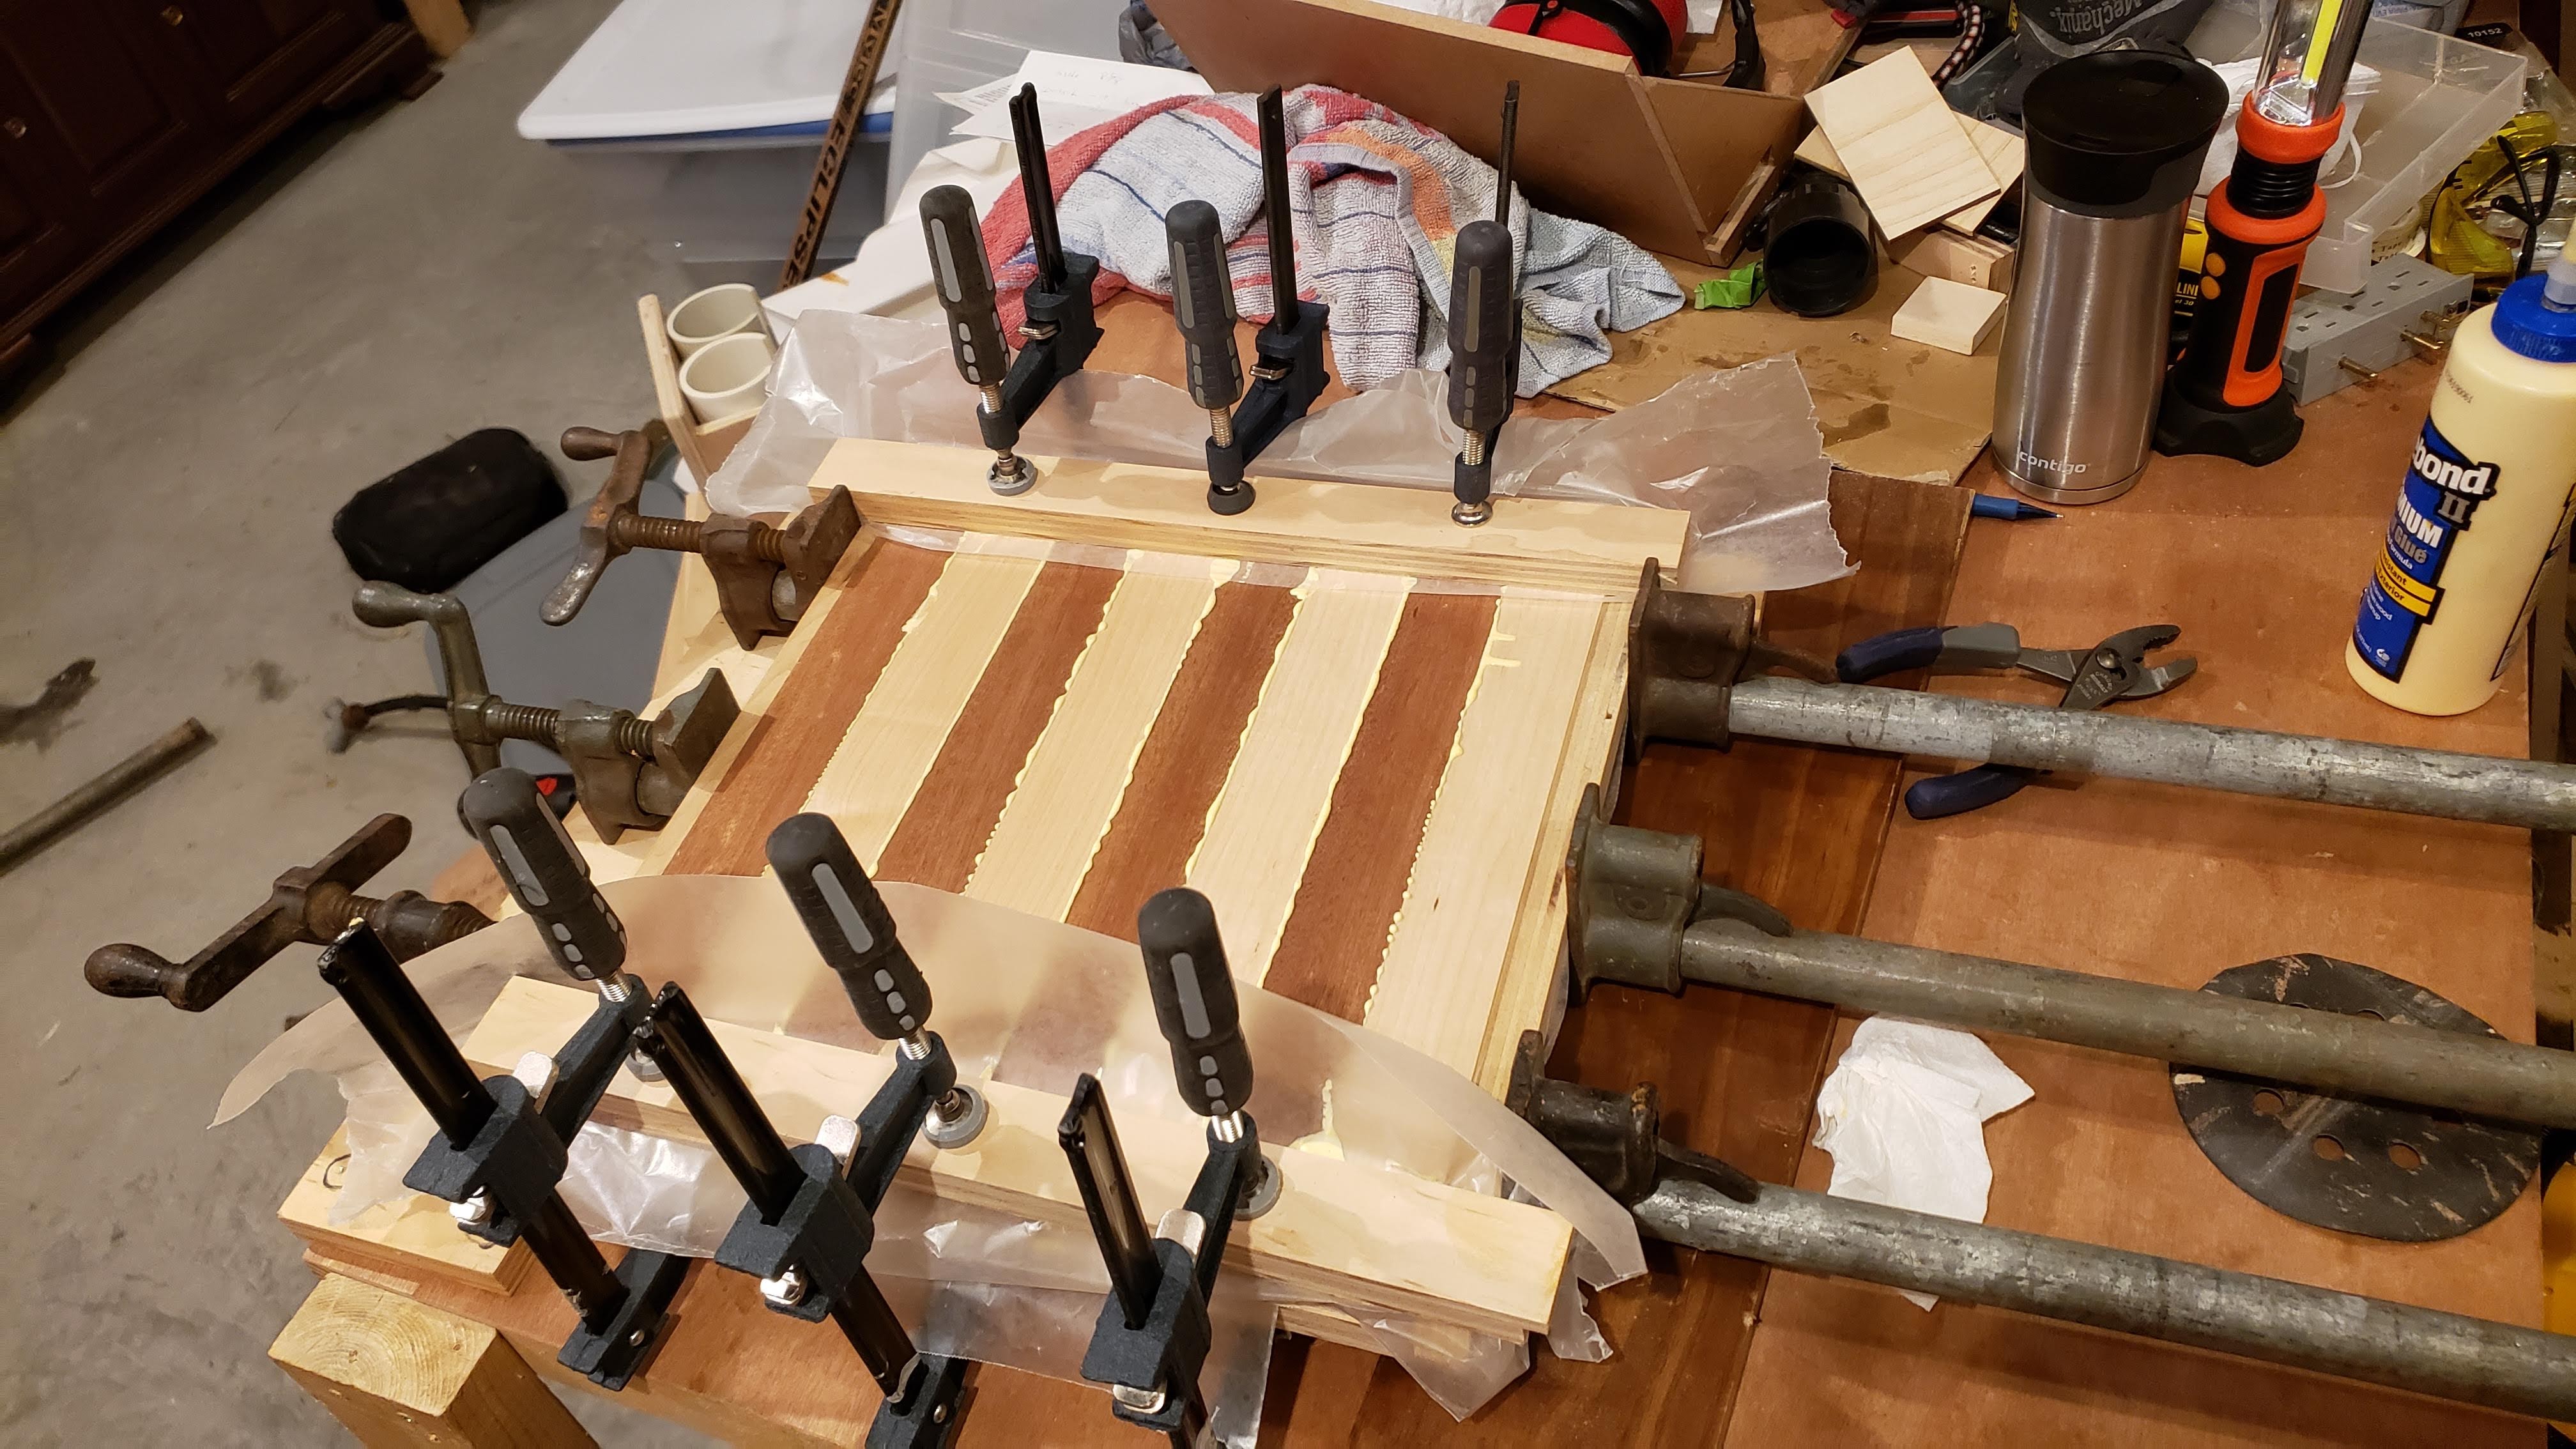

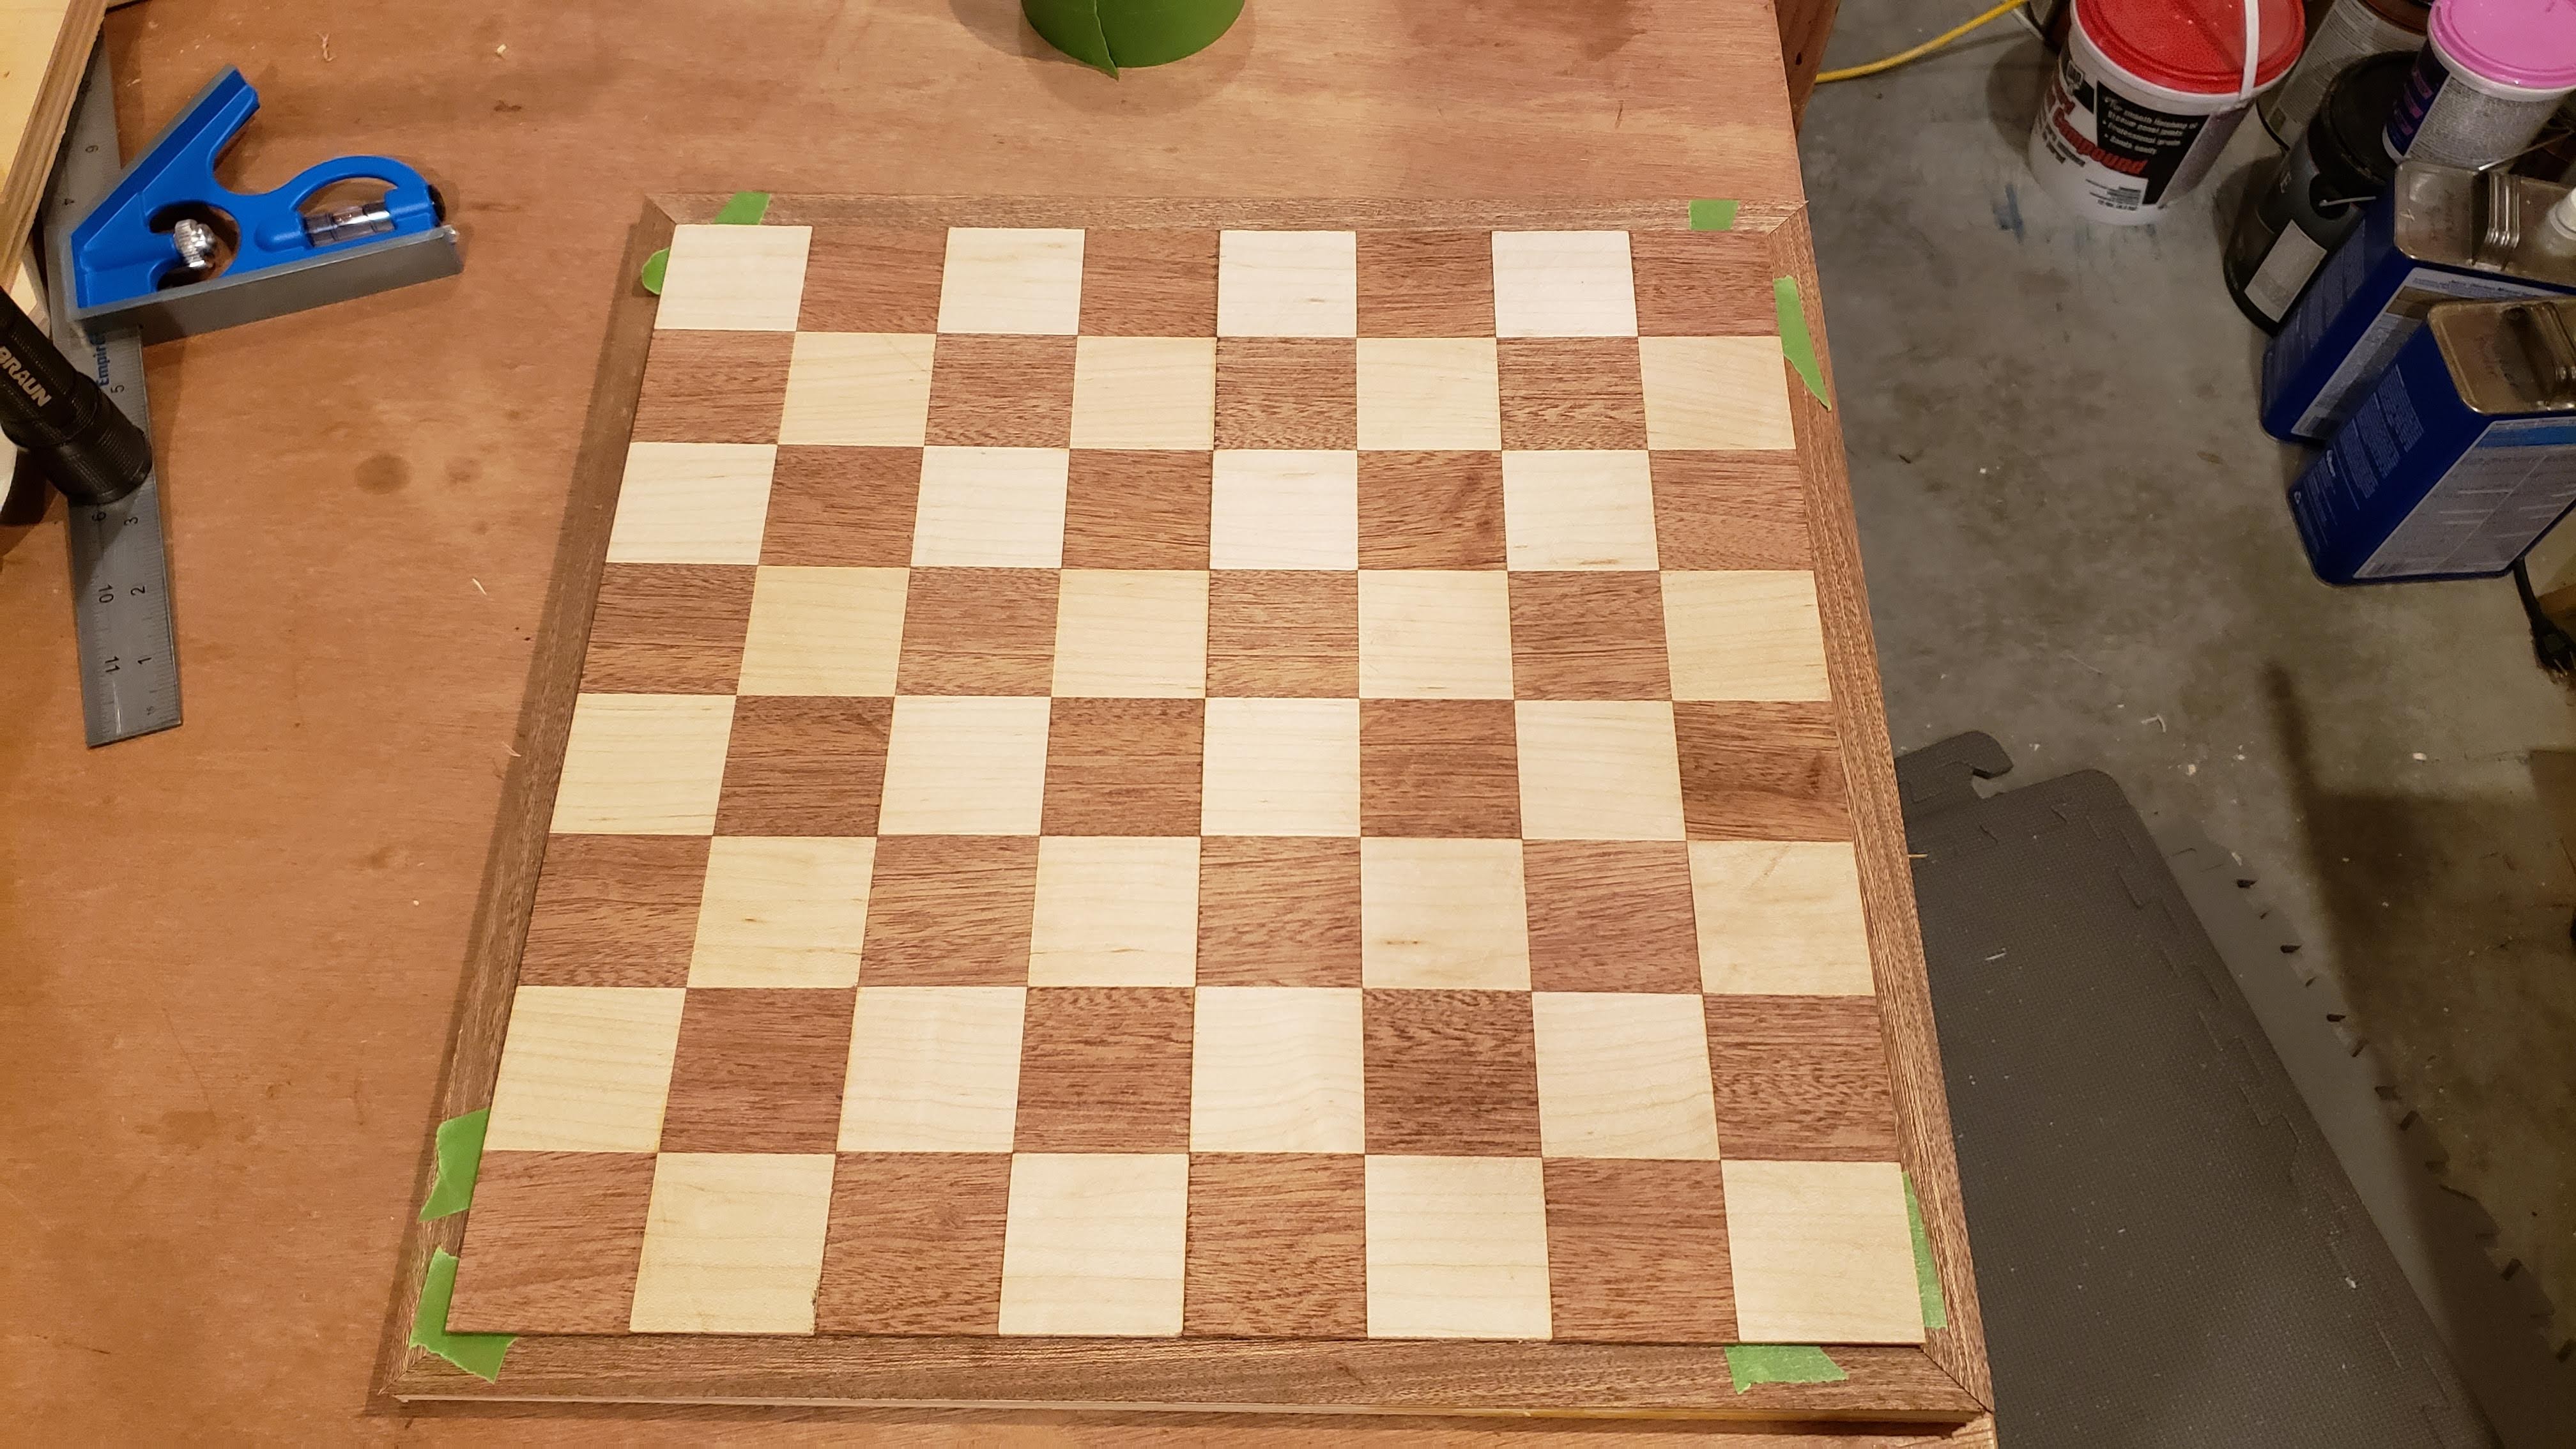
The next step was to take each of those strips and slice off 1/8 inch thick strips to use for the playing field. I didn’t want to use the thick blocks because of concern for wood movement. As it is, I have enough of those blocks left over to make two more chess boards. I then carefully taped strips together on the good side, unfolded enough to put glue in the crease, then laid them flat to let them dry. Essentially used the tape to clamp them for gluing. It actually worked really well to glue up the entire board this way.
It was at this stage that I used the unfinished playing field for a game of chess with my son.


I knew I wanted to have a narrow gap between the playing field and the frame, but I didn’t want the plywood base to be what was seen. So, I trimmed off a very thin layer from the edges of the plywood, cut some thin veneer off of the sapele, mitered those strips, and glued them to the plywood first. Then the playing field would slightly overlap those strips with the rest of the strips being in the dado I would cut in the frame.


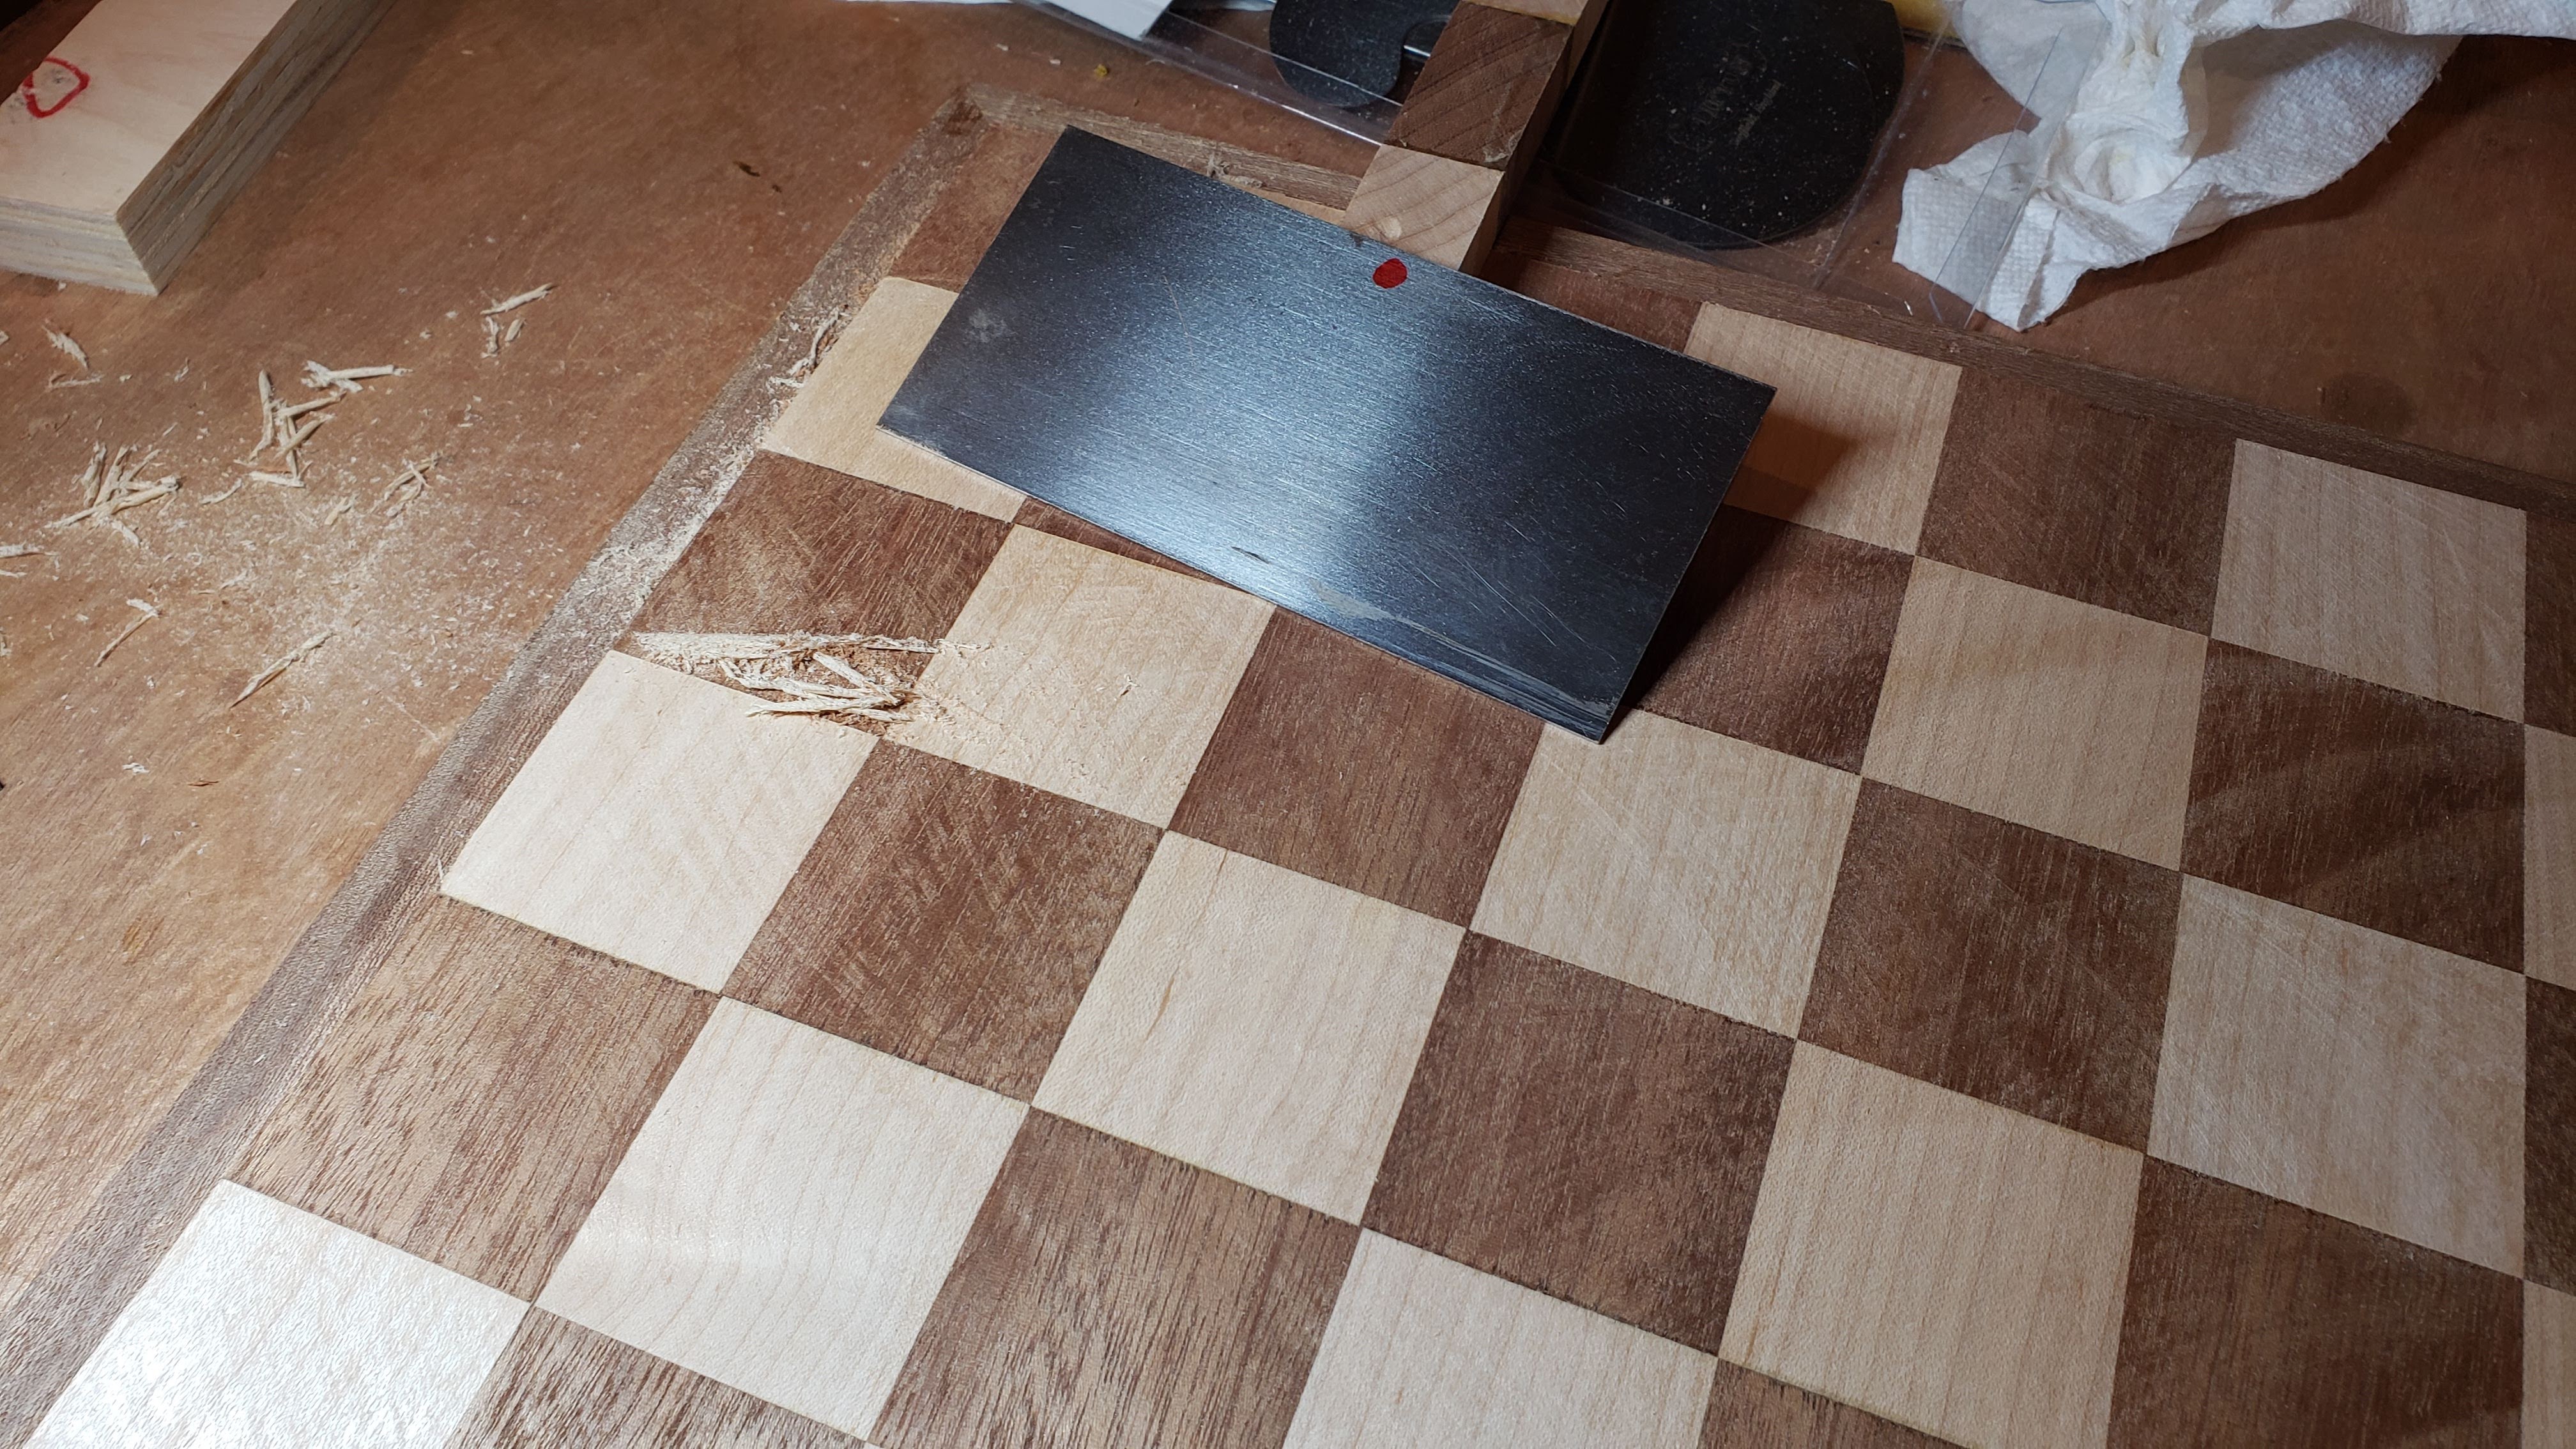
That got me to the point of gluing the playing field to the plywood base. I used a cabinet scraper to level out the slight differences in the squares and get rid of the blade marks. And yeah, I couldn’t resist putting mineral spirits on it to get a look at what it would look like.
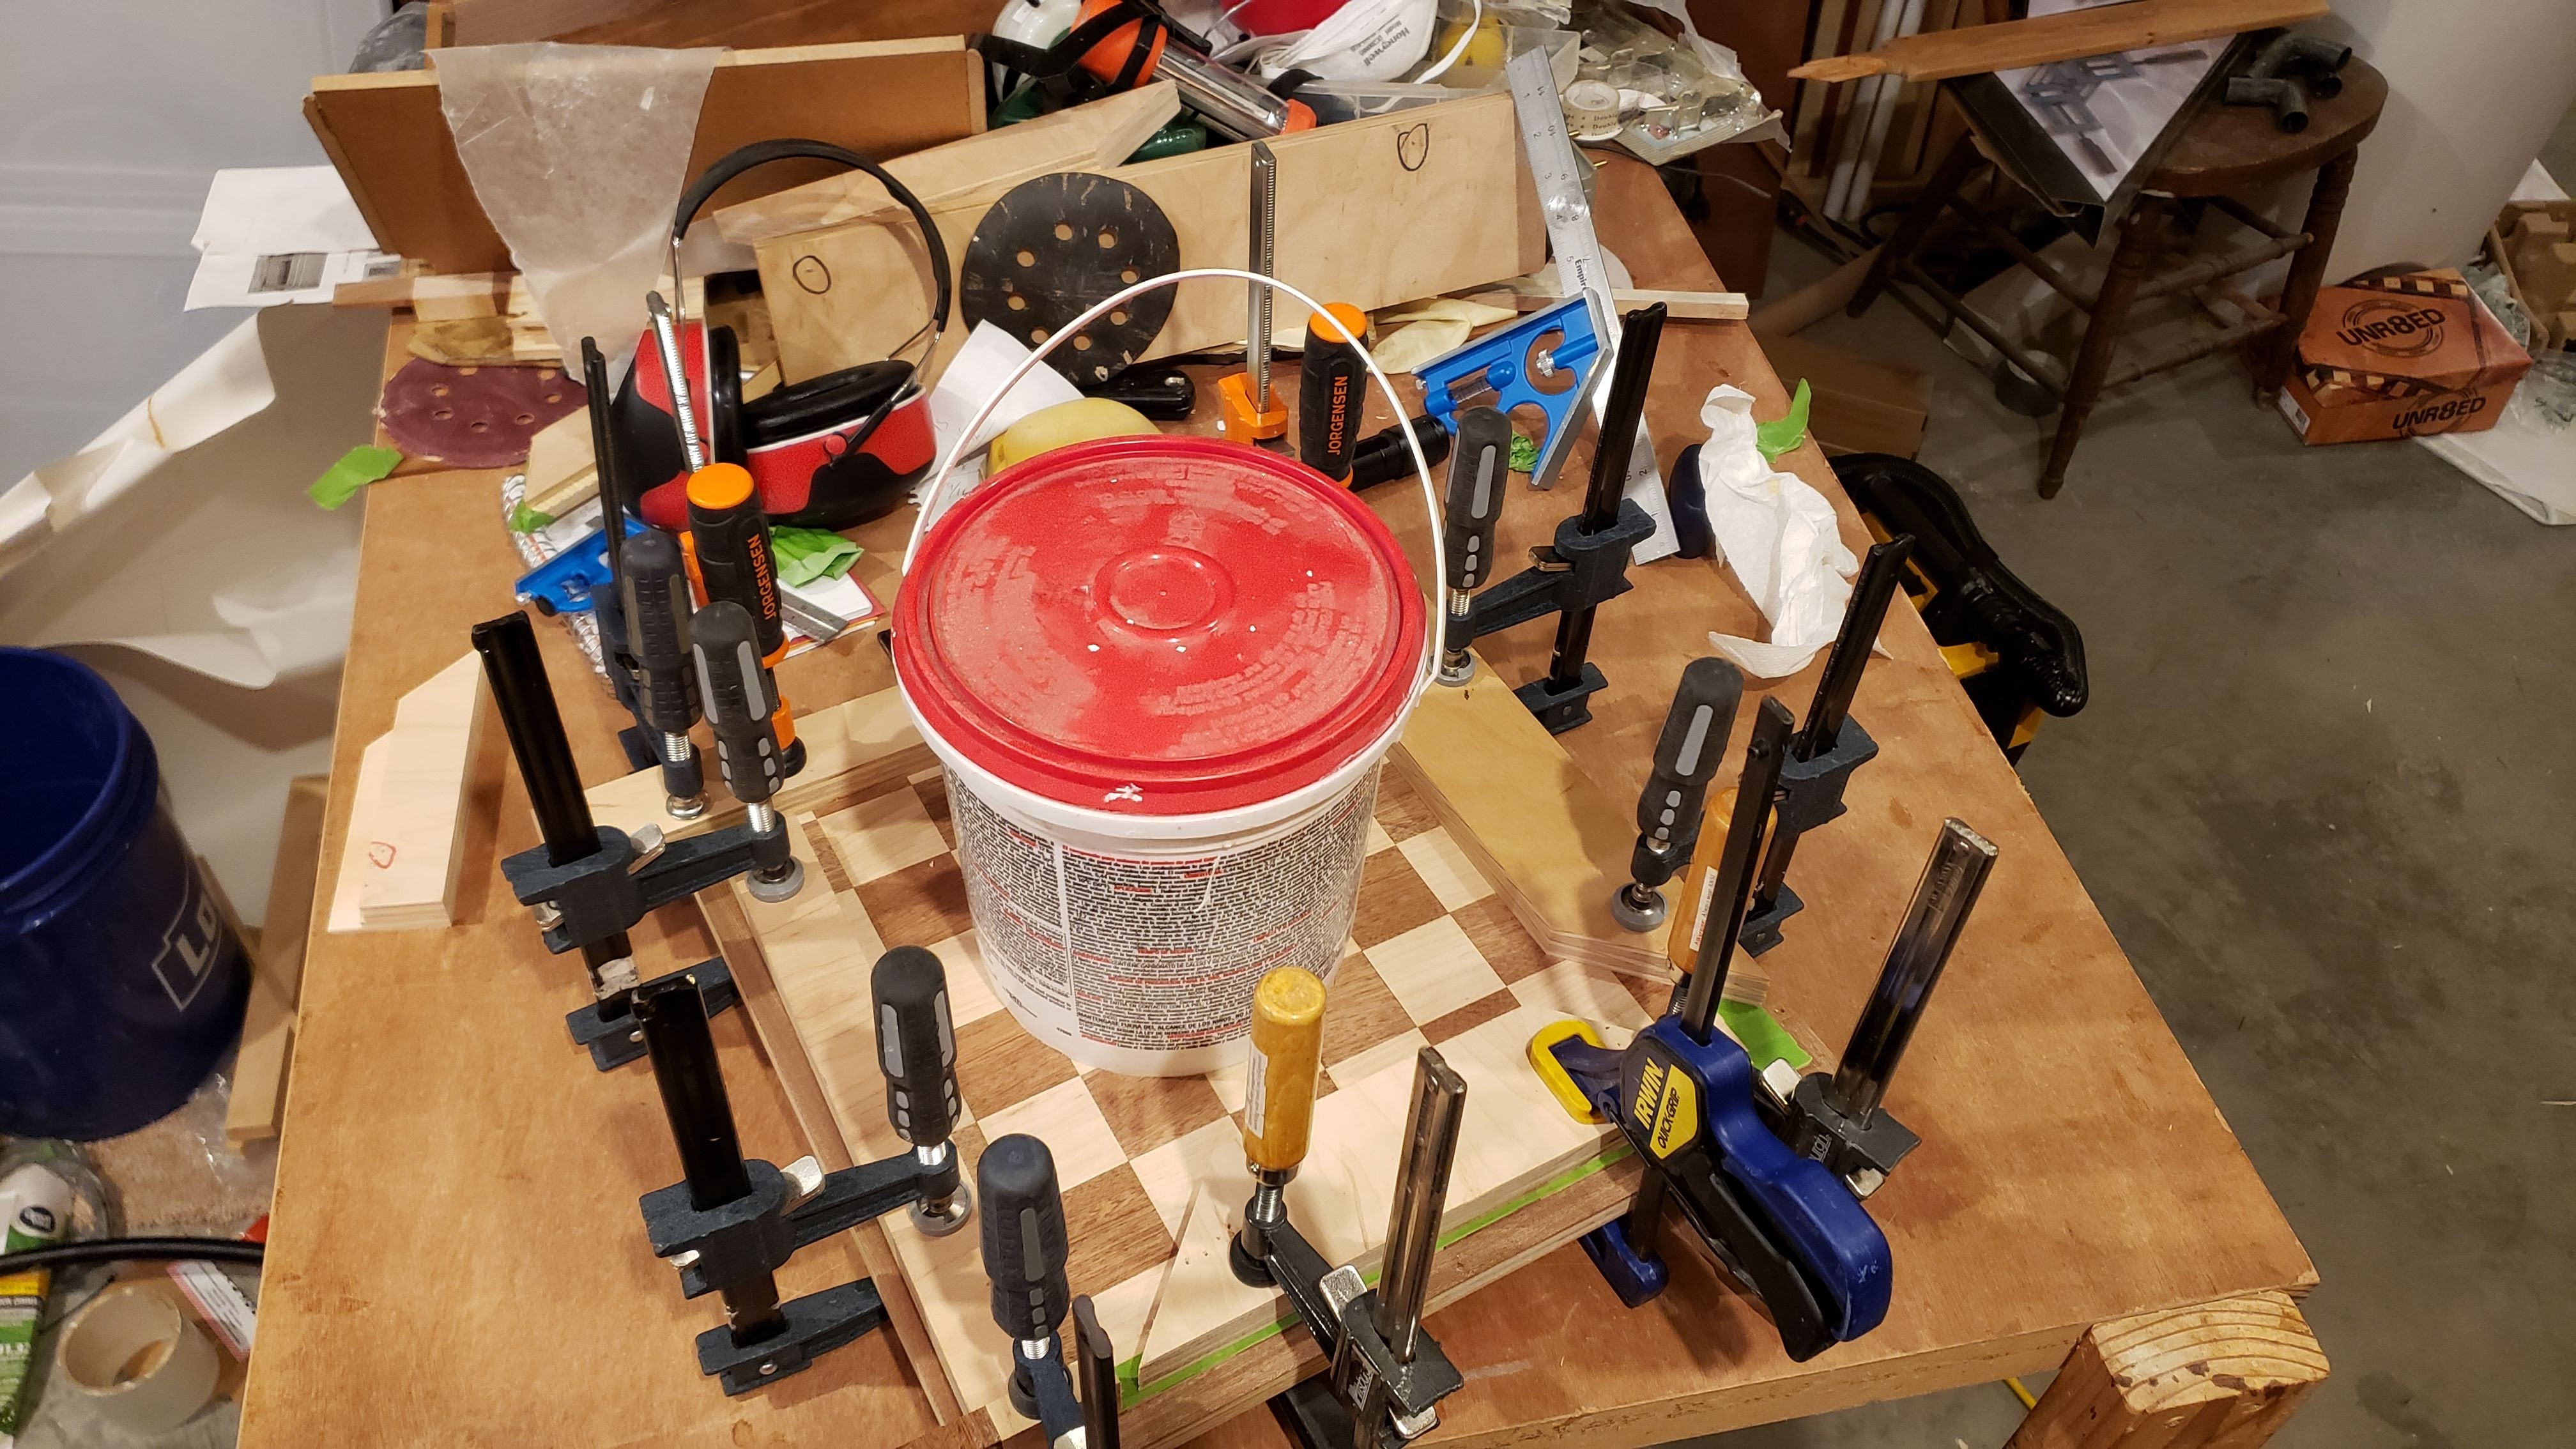


I used my Incra miter gauge to cut the mitered corners for the frame. It took me a while to get it adjusted so that it was square, but once that was done, the angles were spot on.


I then built a spline jig for my table saw. Tested it with some scrap wood before clamping the chess board to it and cutting the spline slots. This is a cut that you get one chance to get right. Cut the splines out of maple and sanded them flush. I forgot to take pictures of the other jig I made to hold the board in place to cut the 10 degree bevels.


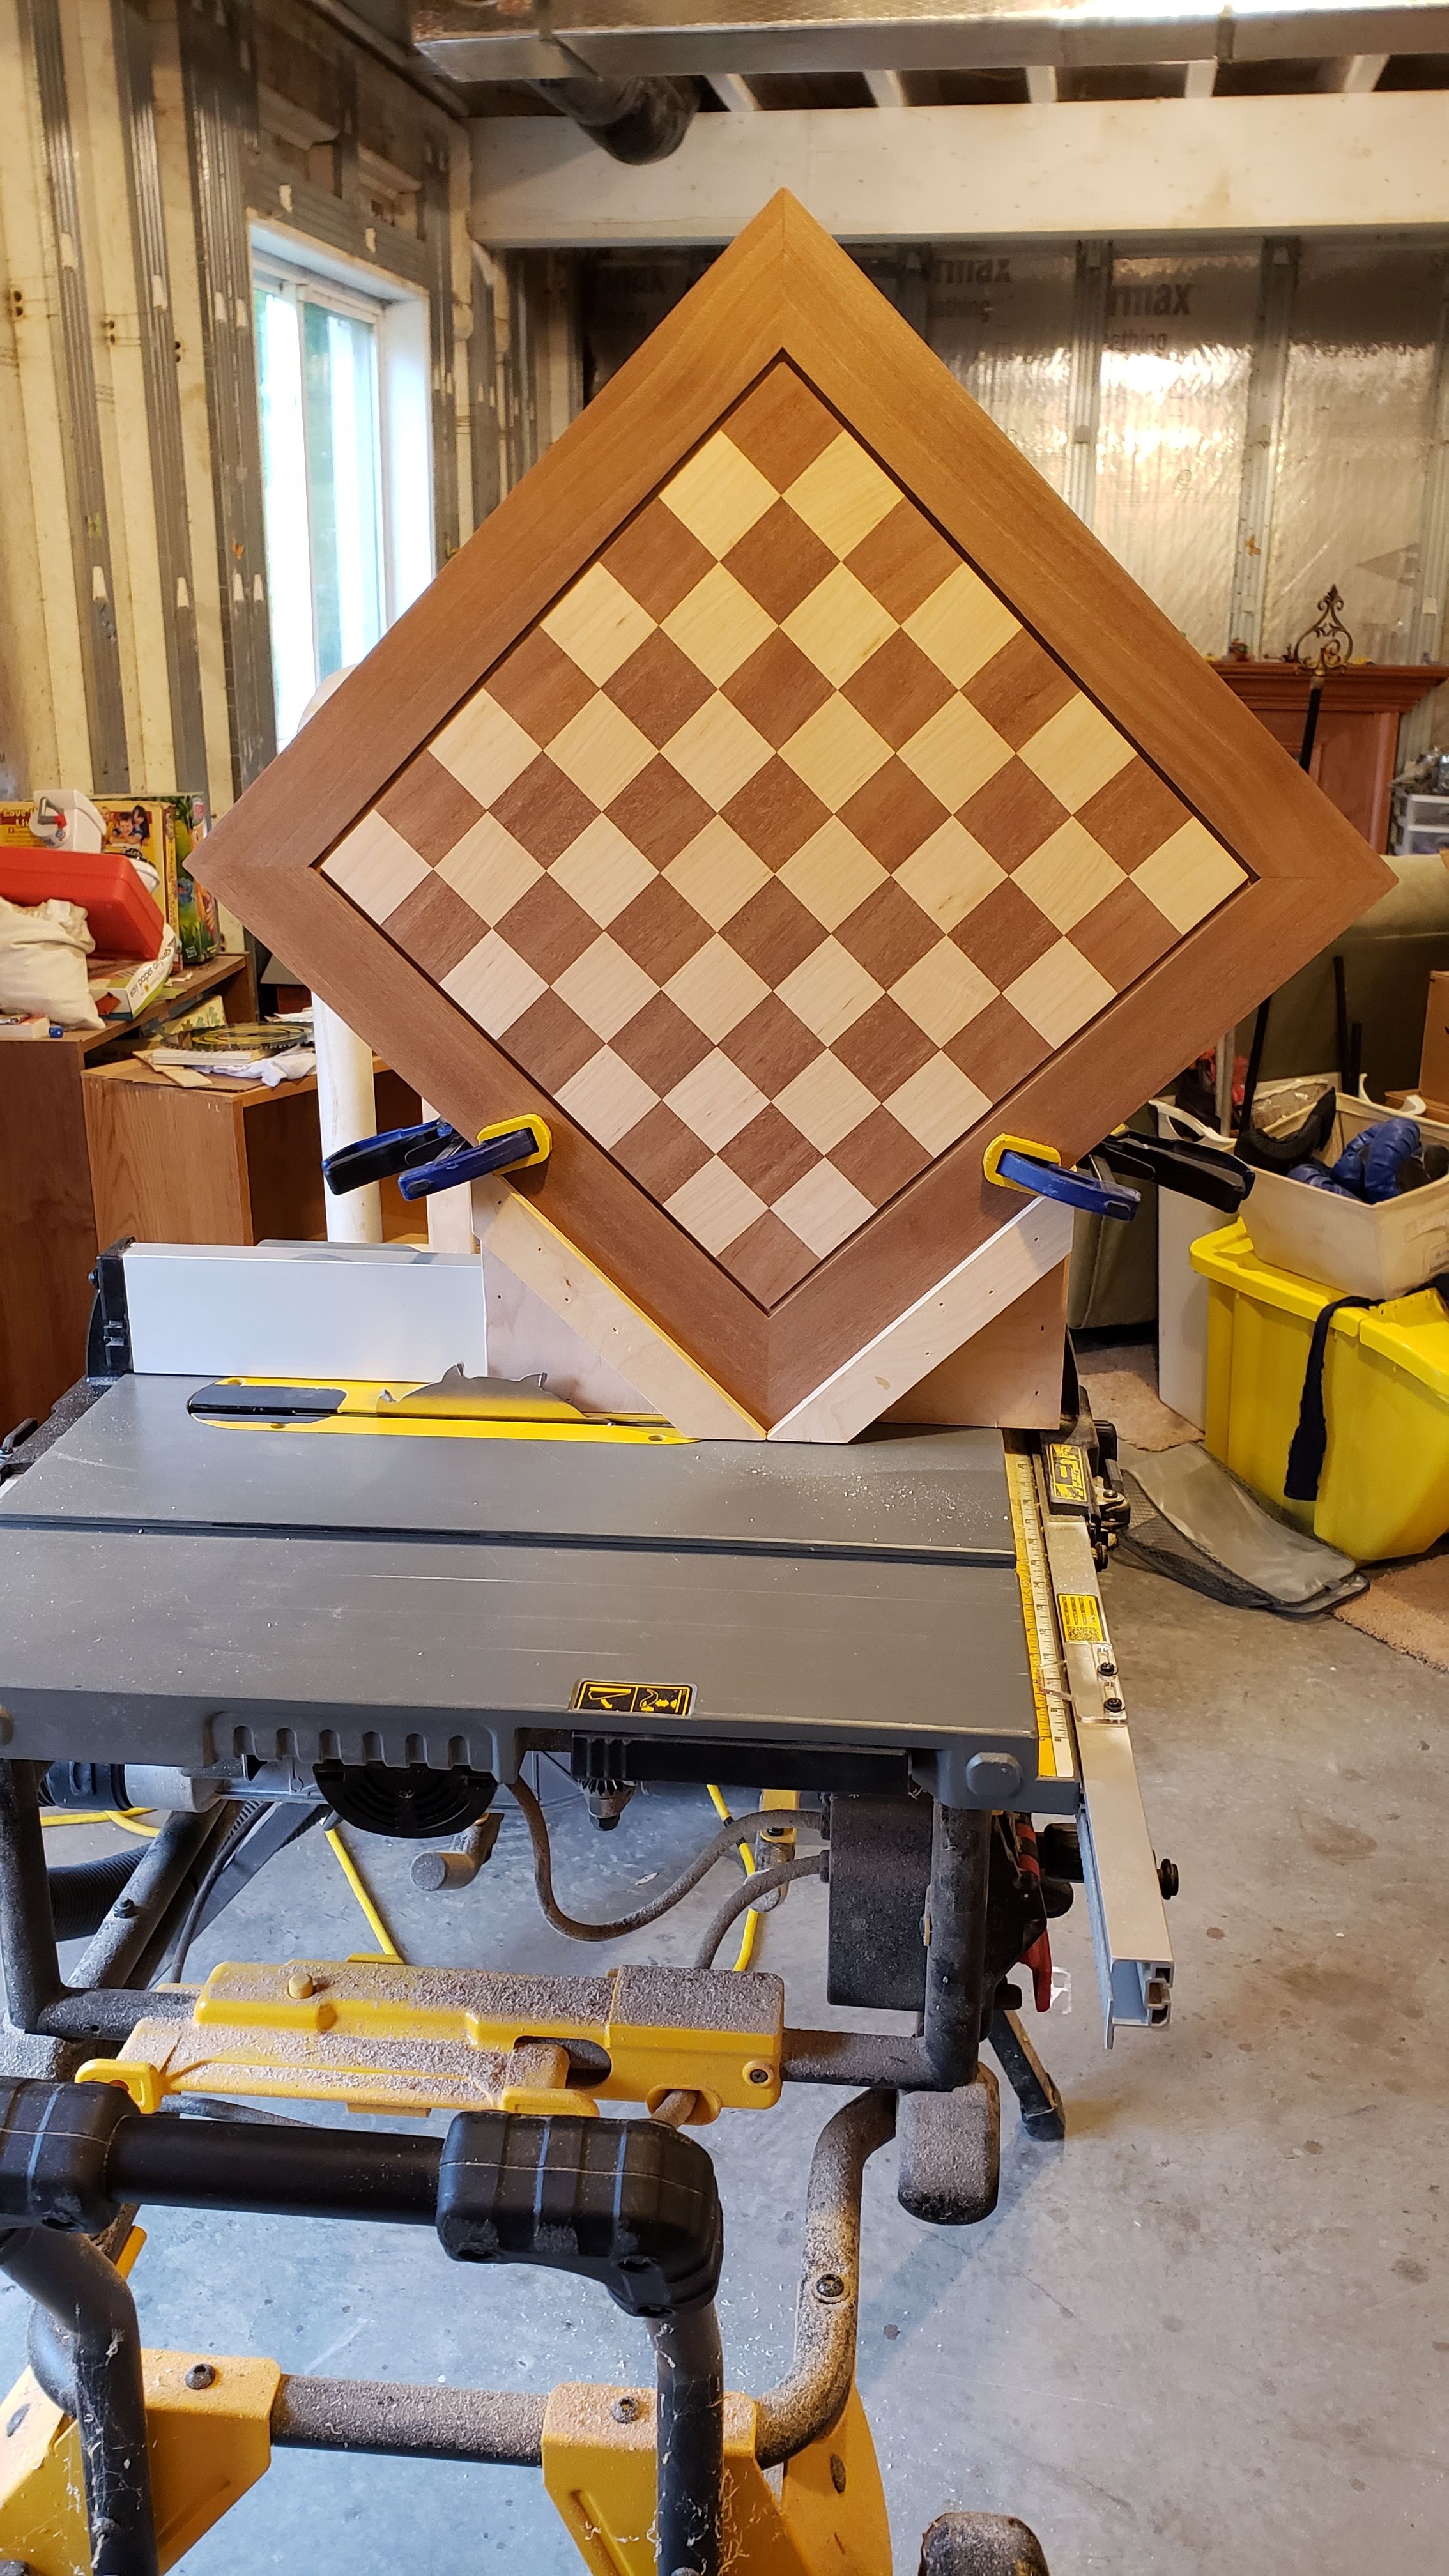


Final result that I’m very happy with. I included a french cleat on the back so I could hang it on the wall.


No comments yet.

Subscribe
Recent Comments
-


Leave a comment