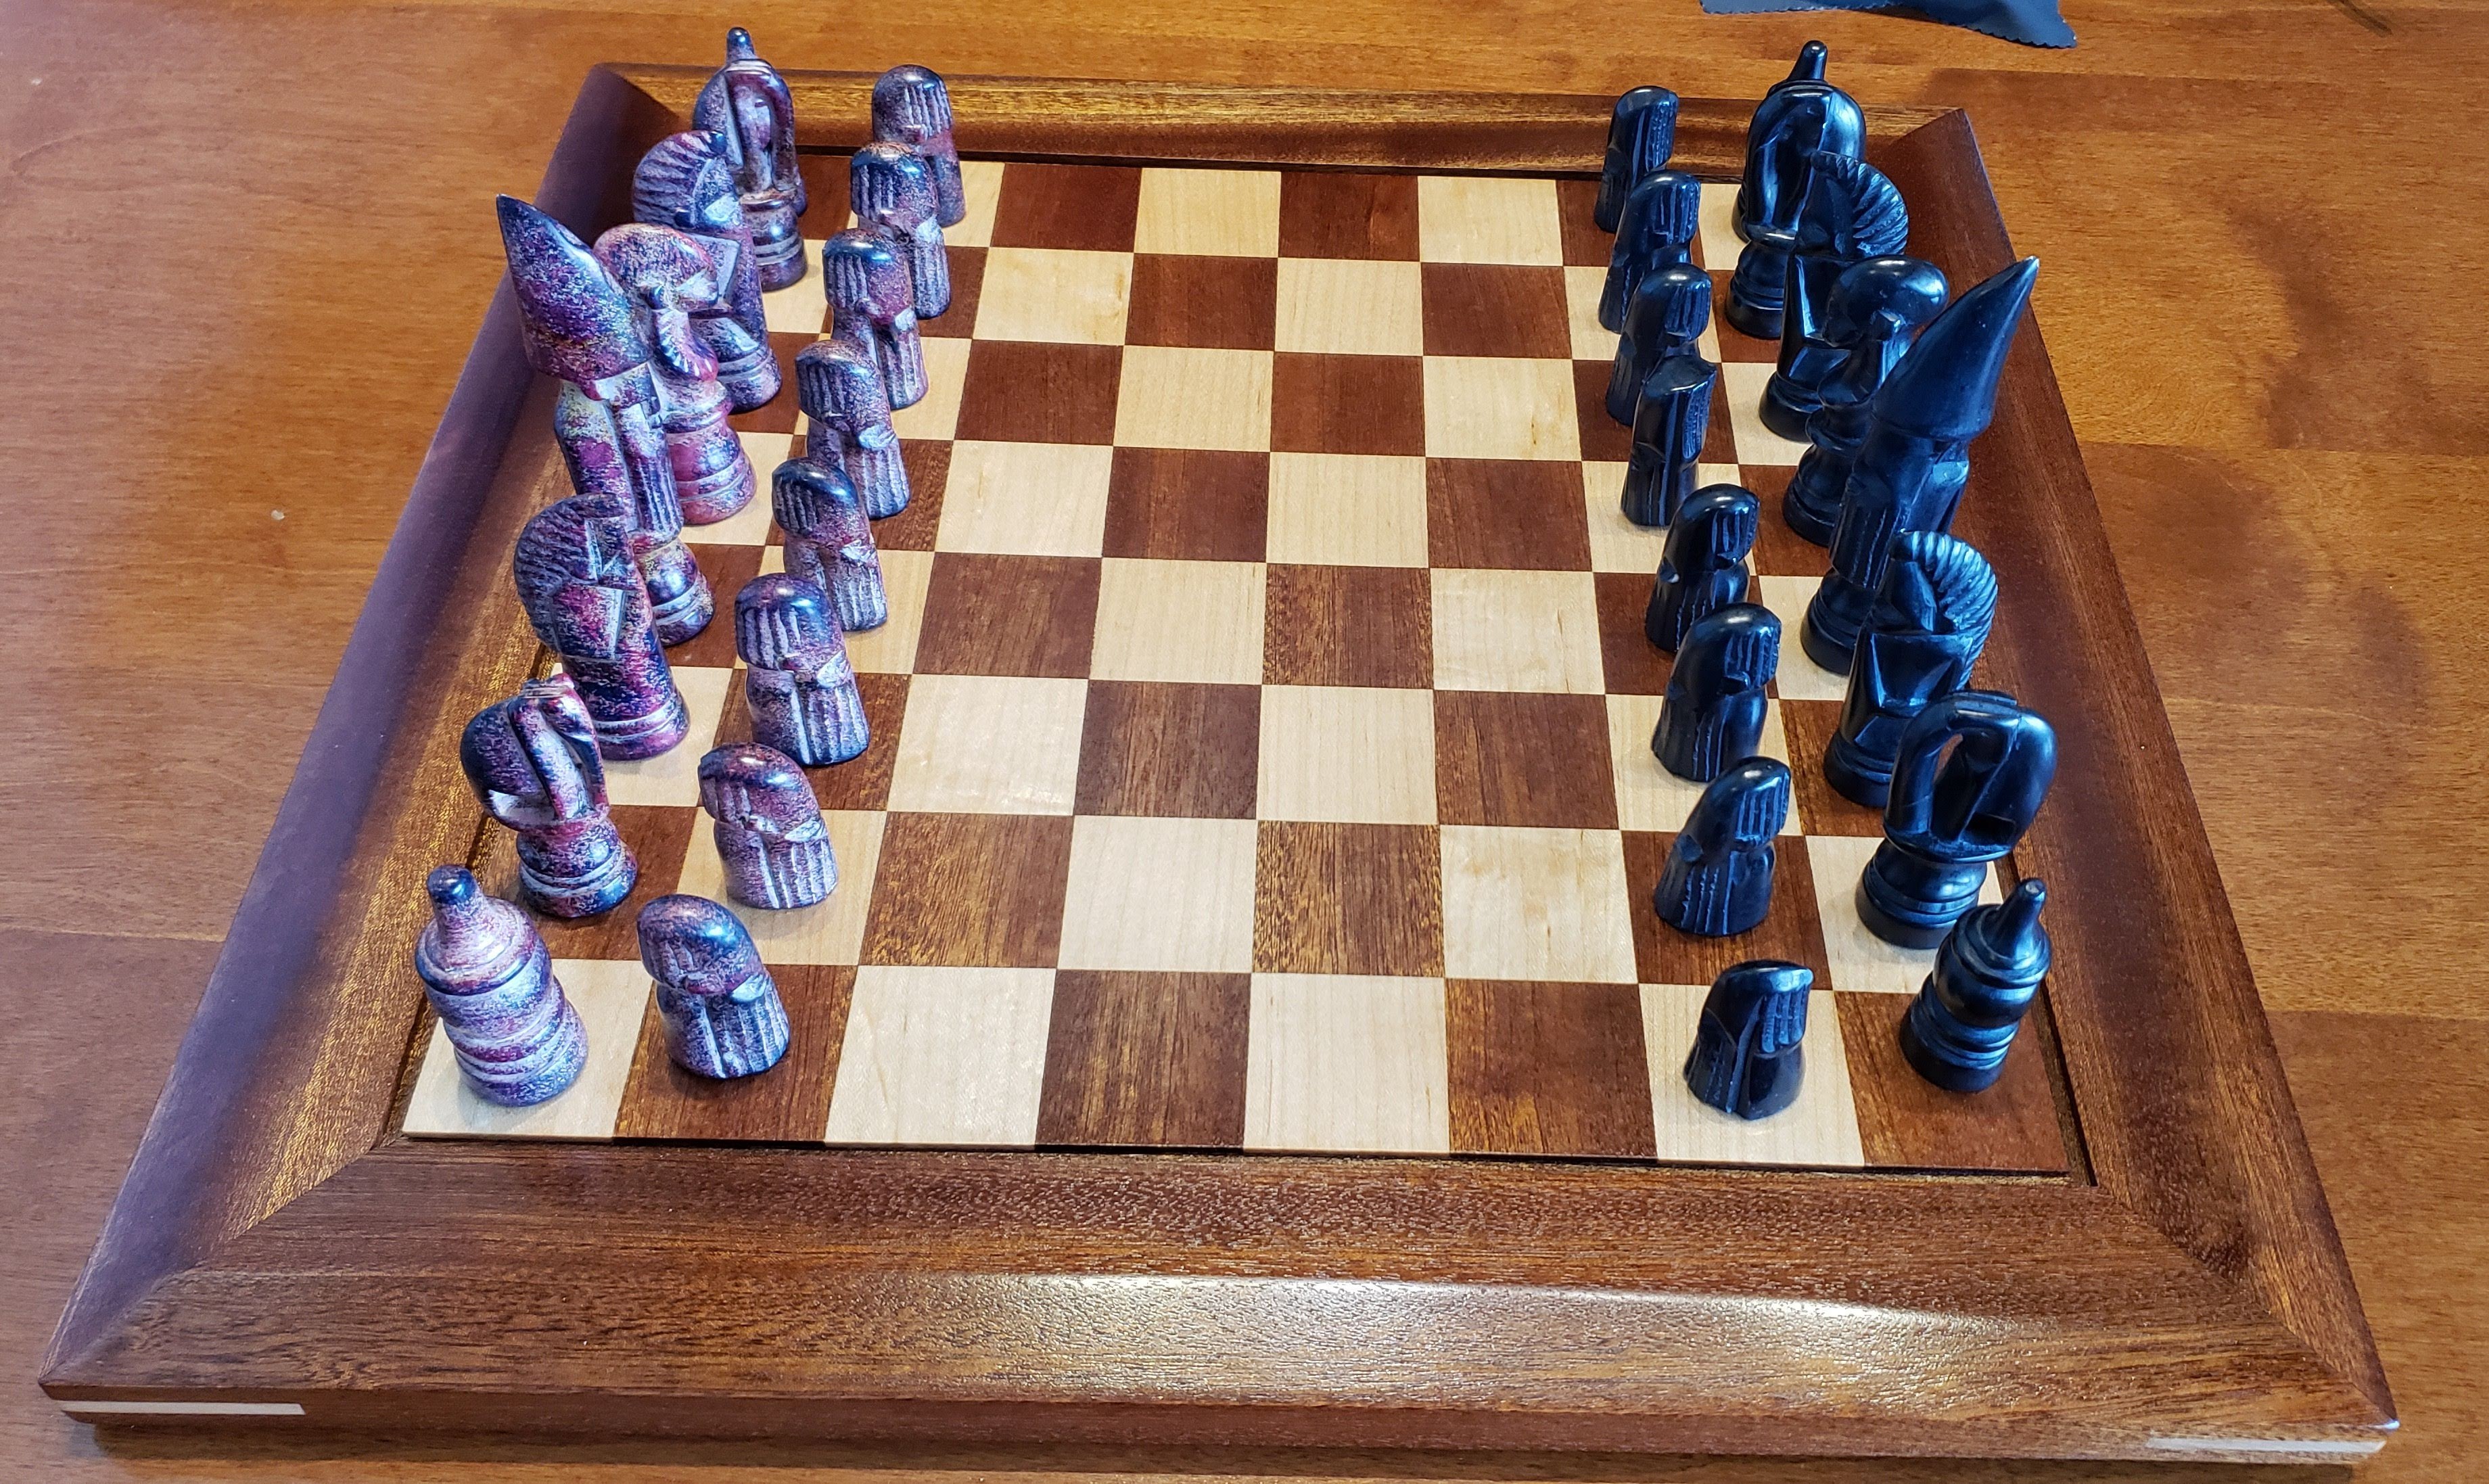
Chess Board
I have a chess set that was given to me by our oldest daughter’s first babysitter (Danielle). Danielle and her family were all family friends. She would come over sometimes, and we would play chess. One summer her family went on a trip to Kenya, and Danielle (who was maybe 14 at the time) came back with gifts for each member of our family. For me she brought back a beautiful hand carved stone chess set. The set also included a stone chess board. Several years after that, we moved from FL to MN, and then six years later we moved from MN to PA. Somehow in the move from MN to PA, the chess board got lost. Julie and I were both positive we put it carefully in the bottom of the cedar chest where it would be safe. When we got to PA, it wasn’t there. We have no idea what happened, but that beautiful board is no longer available to use with those hand carved pieces. I have played with my son, but the only chess board we have that is large enough to use with the pieces is a fold up cardboard Super Mario chess board. It just feels wrong to use those pieces on that board! I have wanted to build a chess board that was worthy of those pieces for a while, and I finally did so.
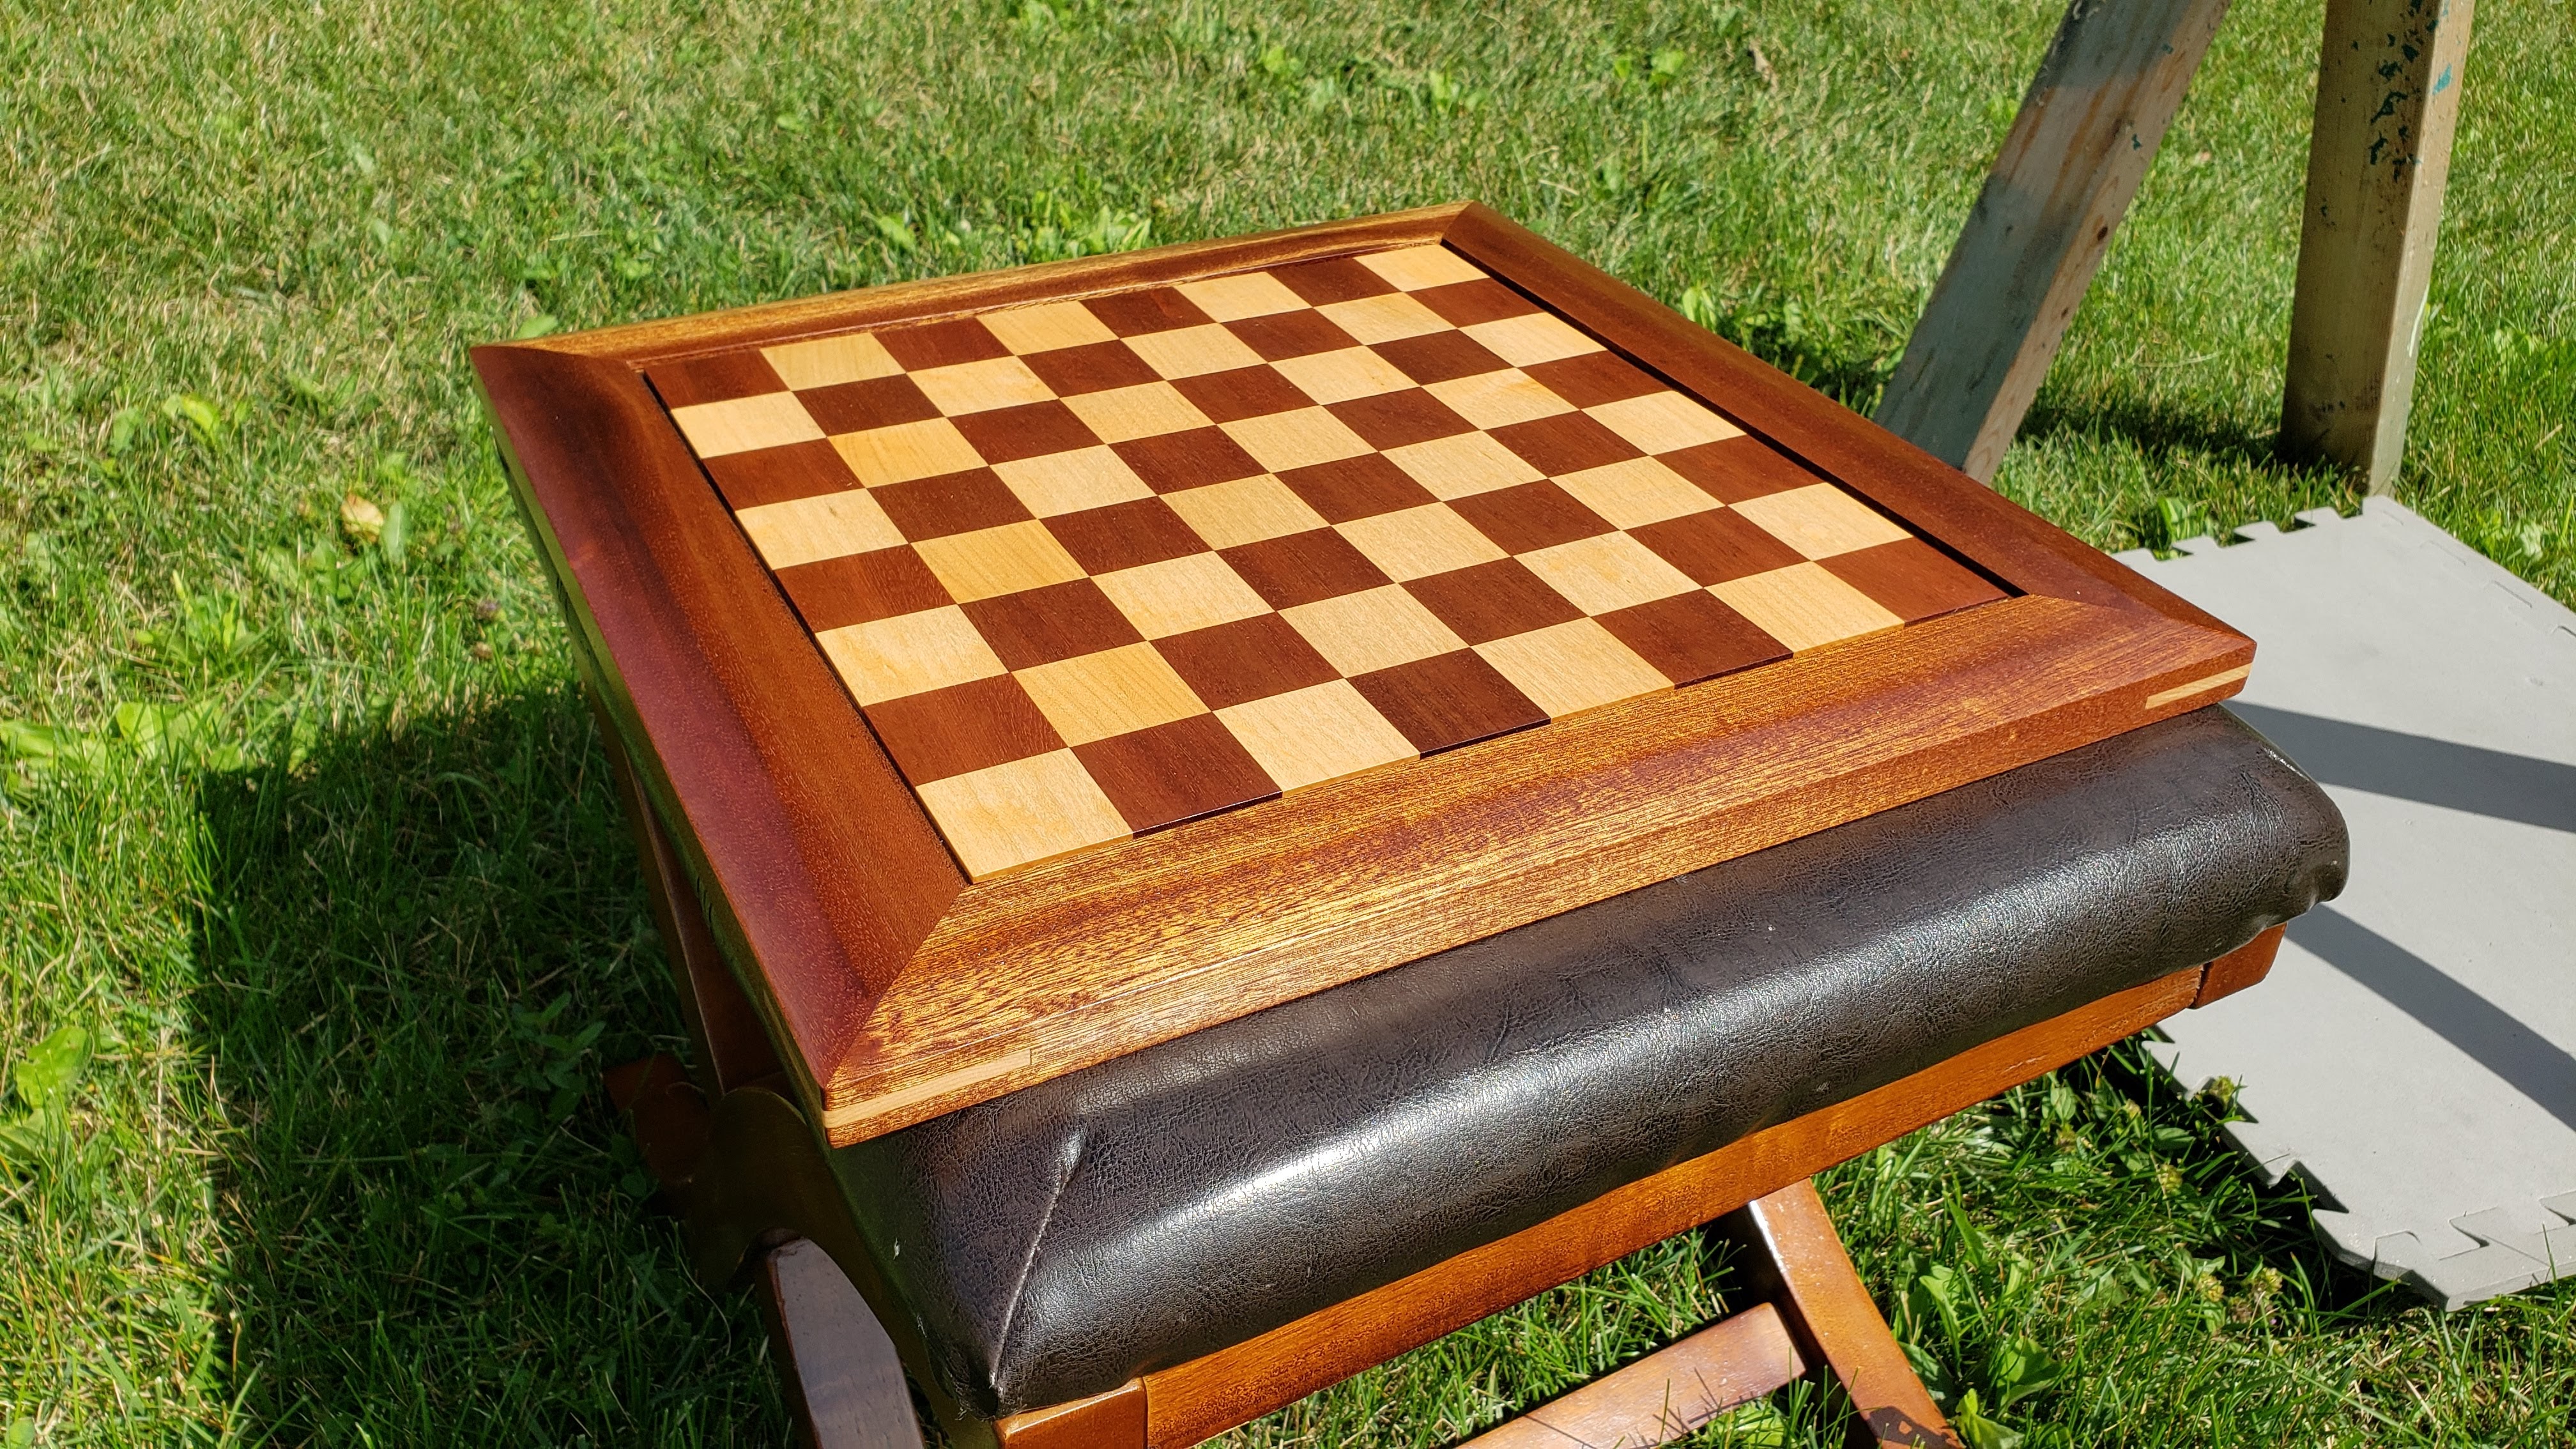
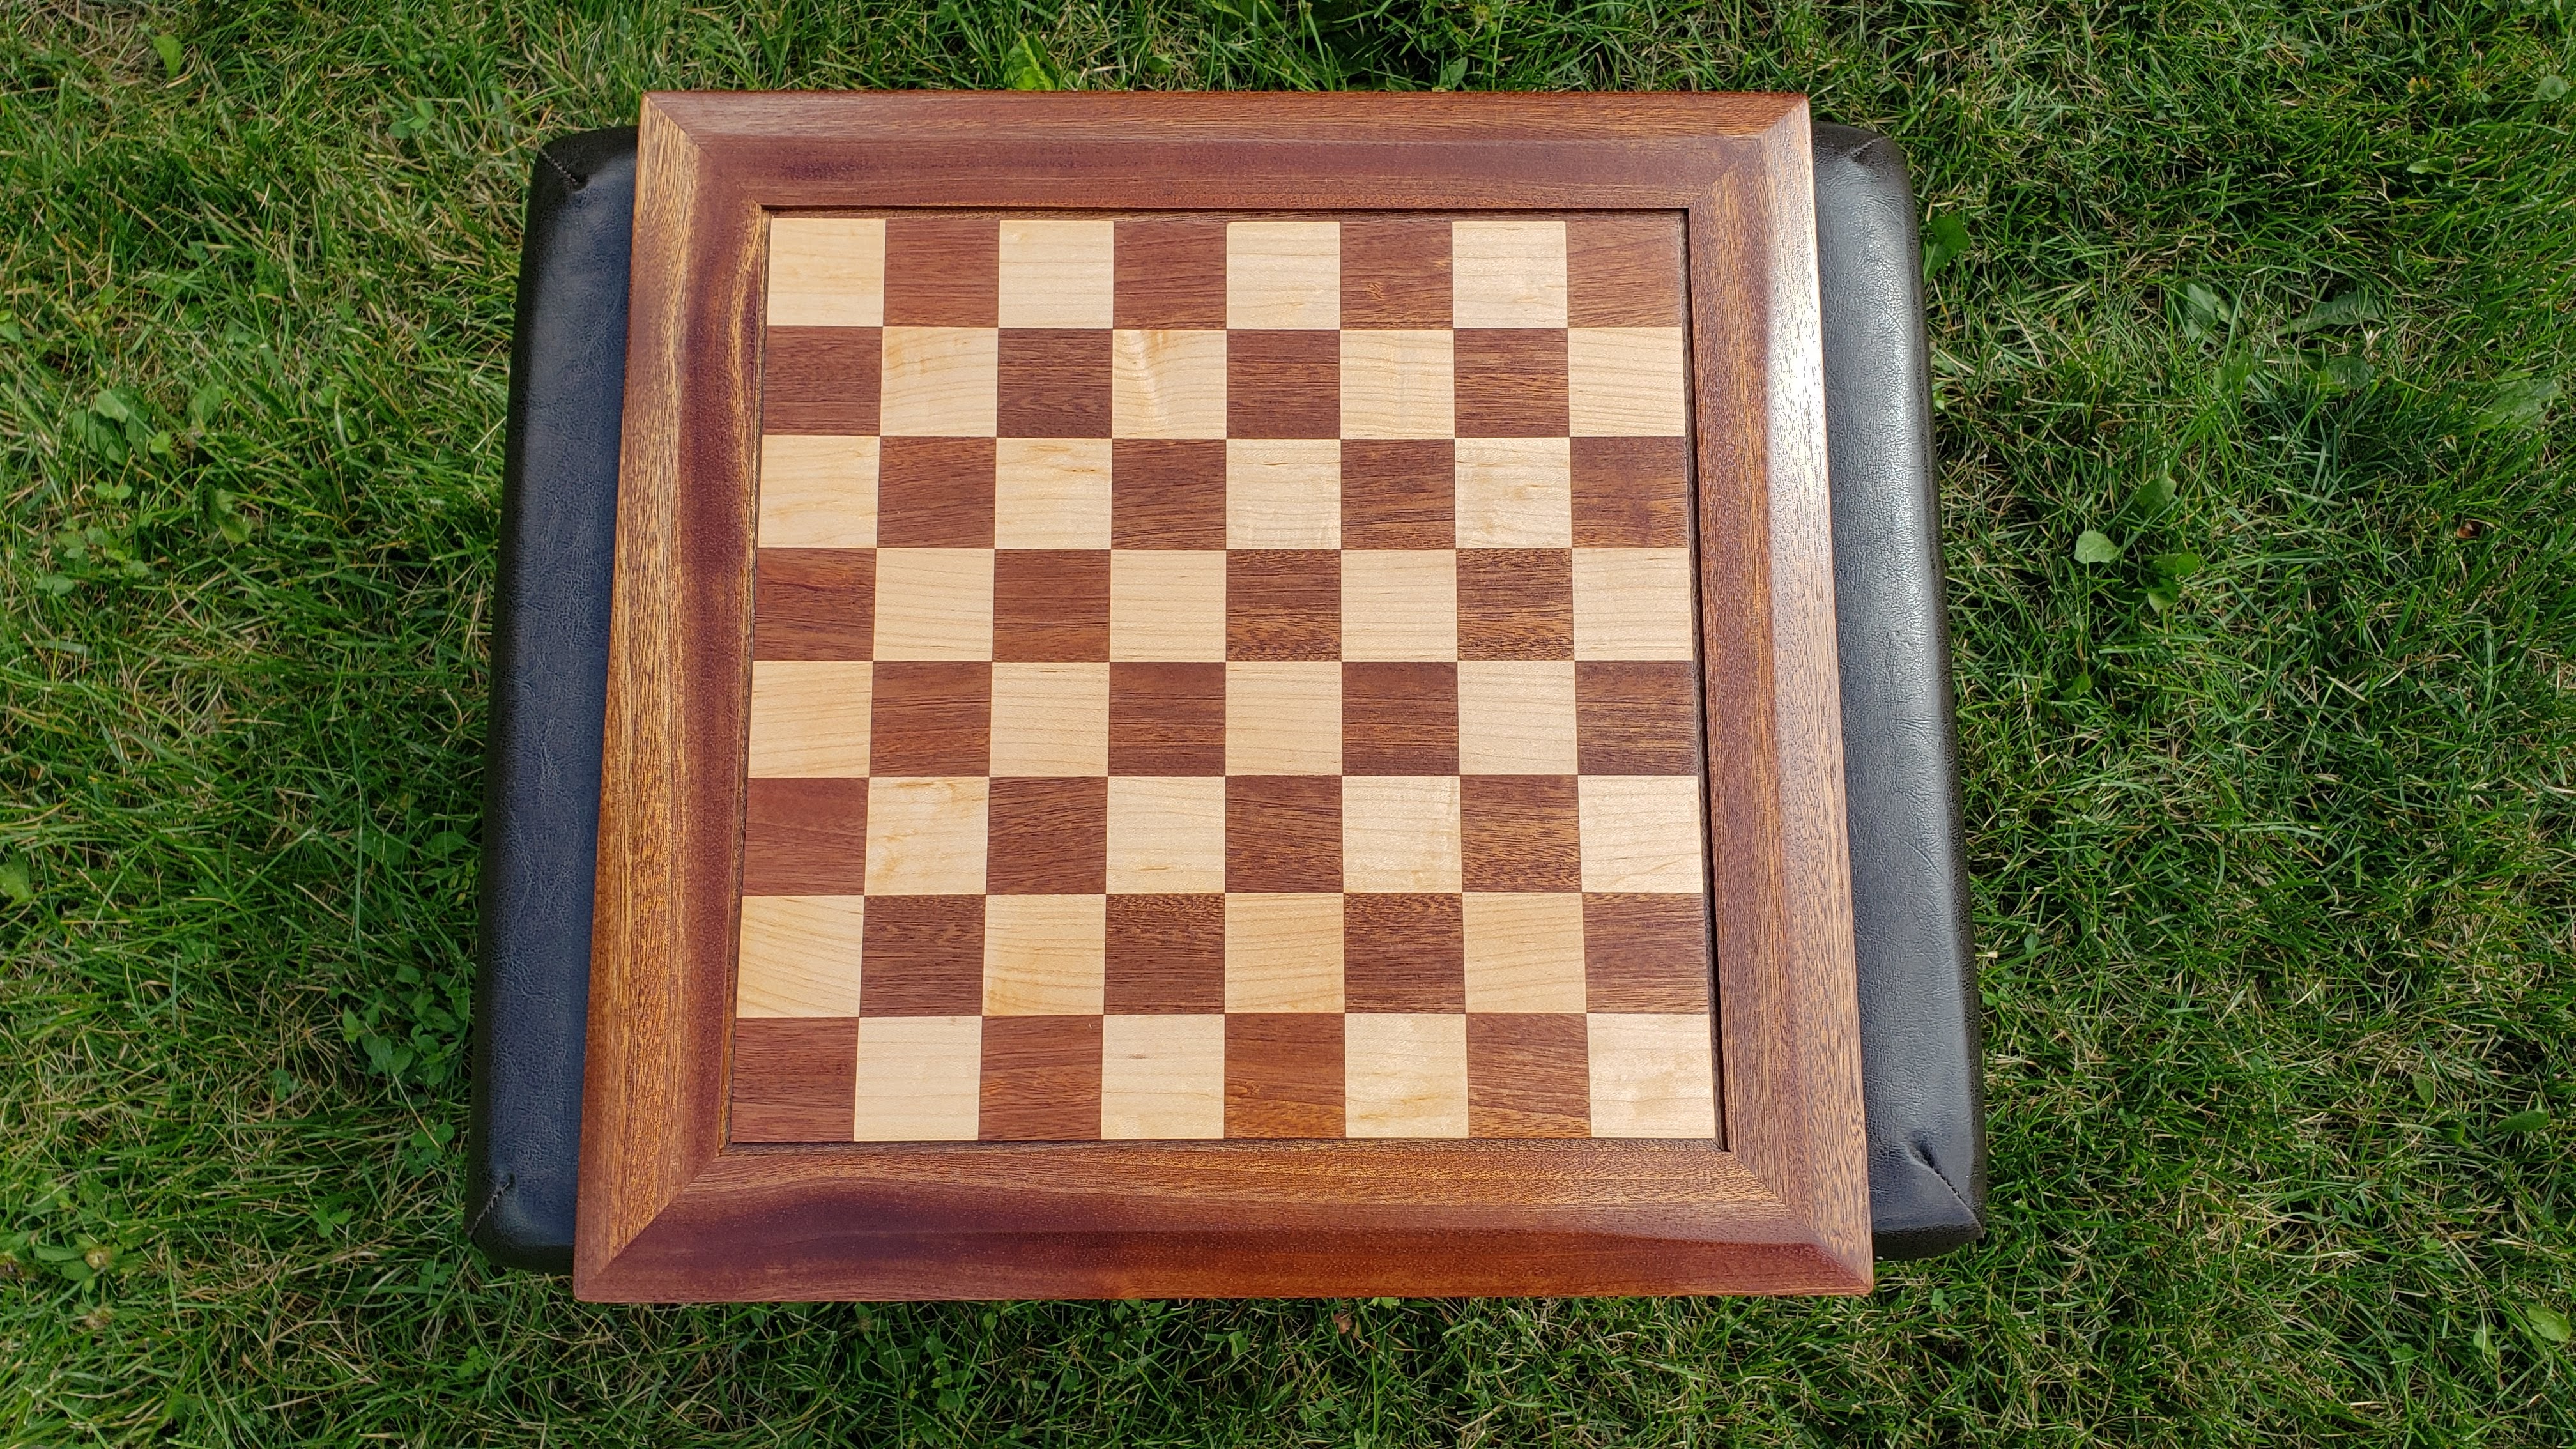
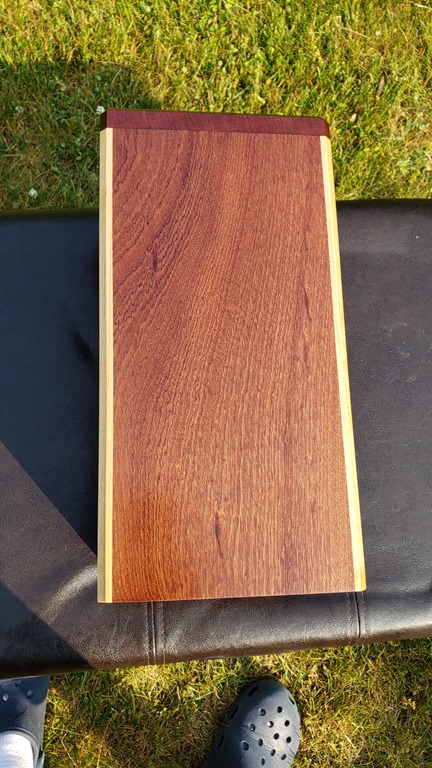
When I used the sapele to make the urn for my friend Kerry, I knew that I wanted to use that wood on the chess board also. I looked at a lot of pictures of chess boards to get ideas for how I wanted to design it. I also watched a number of YouTube videos to understand what I needed to take into account with regards to wood movement. The result is a sapele and maple board. It has maple corner splines, and all edges of the frame are beveled (top and bottom) at 10 degrees. The playing field itself is just under 1/8 inch thick and is glued to 3/4 inch birch plywood. The bottom side of the plywood has a layer of 1/8 inch thick maple to counterbalance any potential wood movement of the top. The frame is also sapele. Info on the build process is below the video.
The Build Process
The first step was to glue up strips of maple and sapele, then cut that into strips across the grain. I knew I wanted the squares to be right around 1.75 inches based on the size of the pieces. I thought I had cut the strips long enough that I would have around an inch of scrap left over. I was getting concerned as I got closer to cutting the last strip…ended up only having 7/64 of an inch of scrap left on one of them. What I didn’t include pictures of was that before I could make the first cut on this, I had to make sure that my table saw sled was perfectly square. I’ve used that sled hard the last few years, and it wasn’t perfectly square when I checked it. So…I built a new front fence for the sled and used the five cut method to square it up to within .001 inch of square.
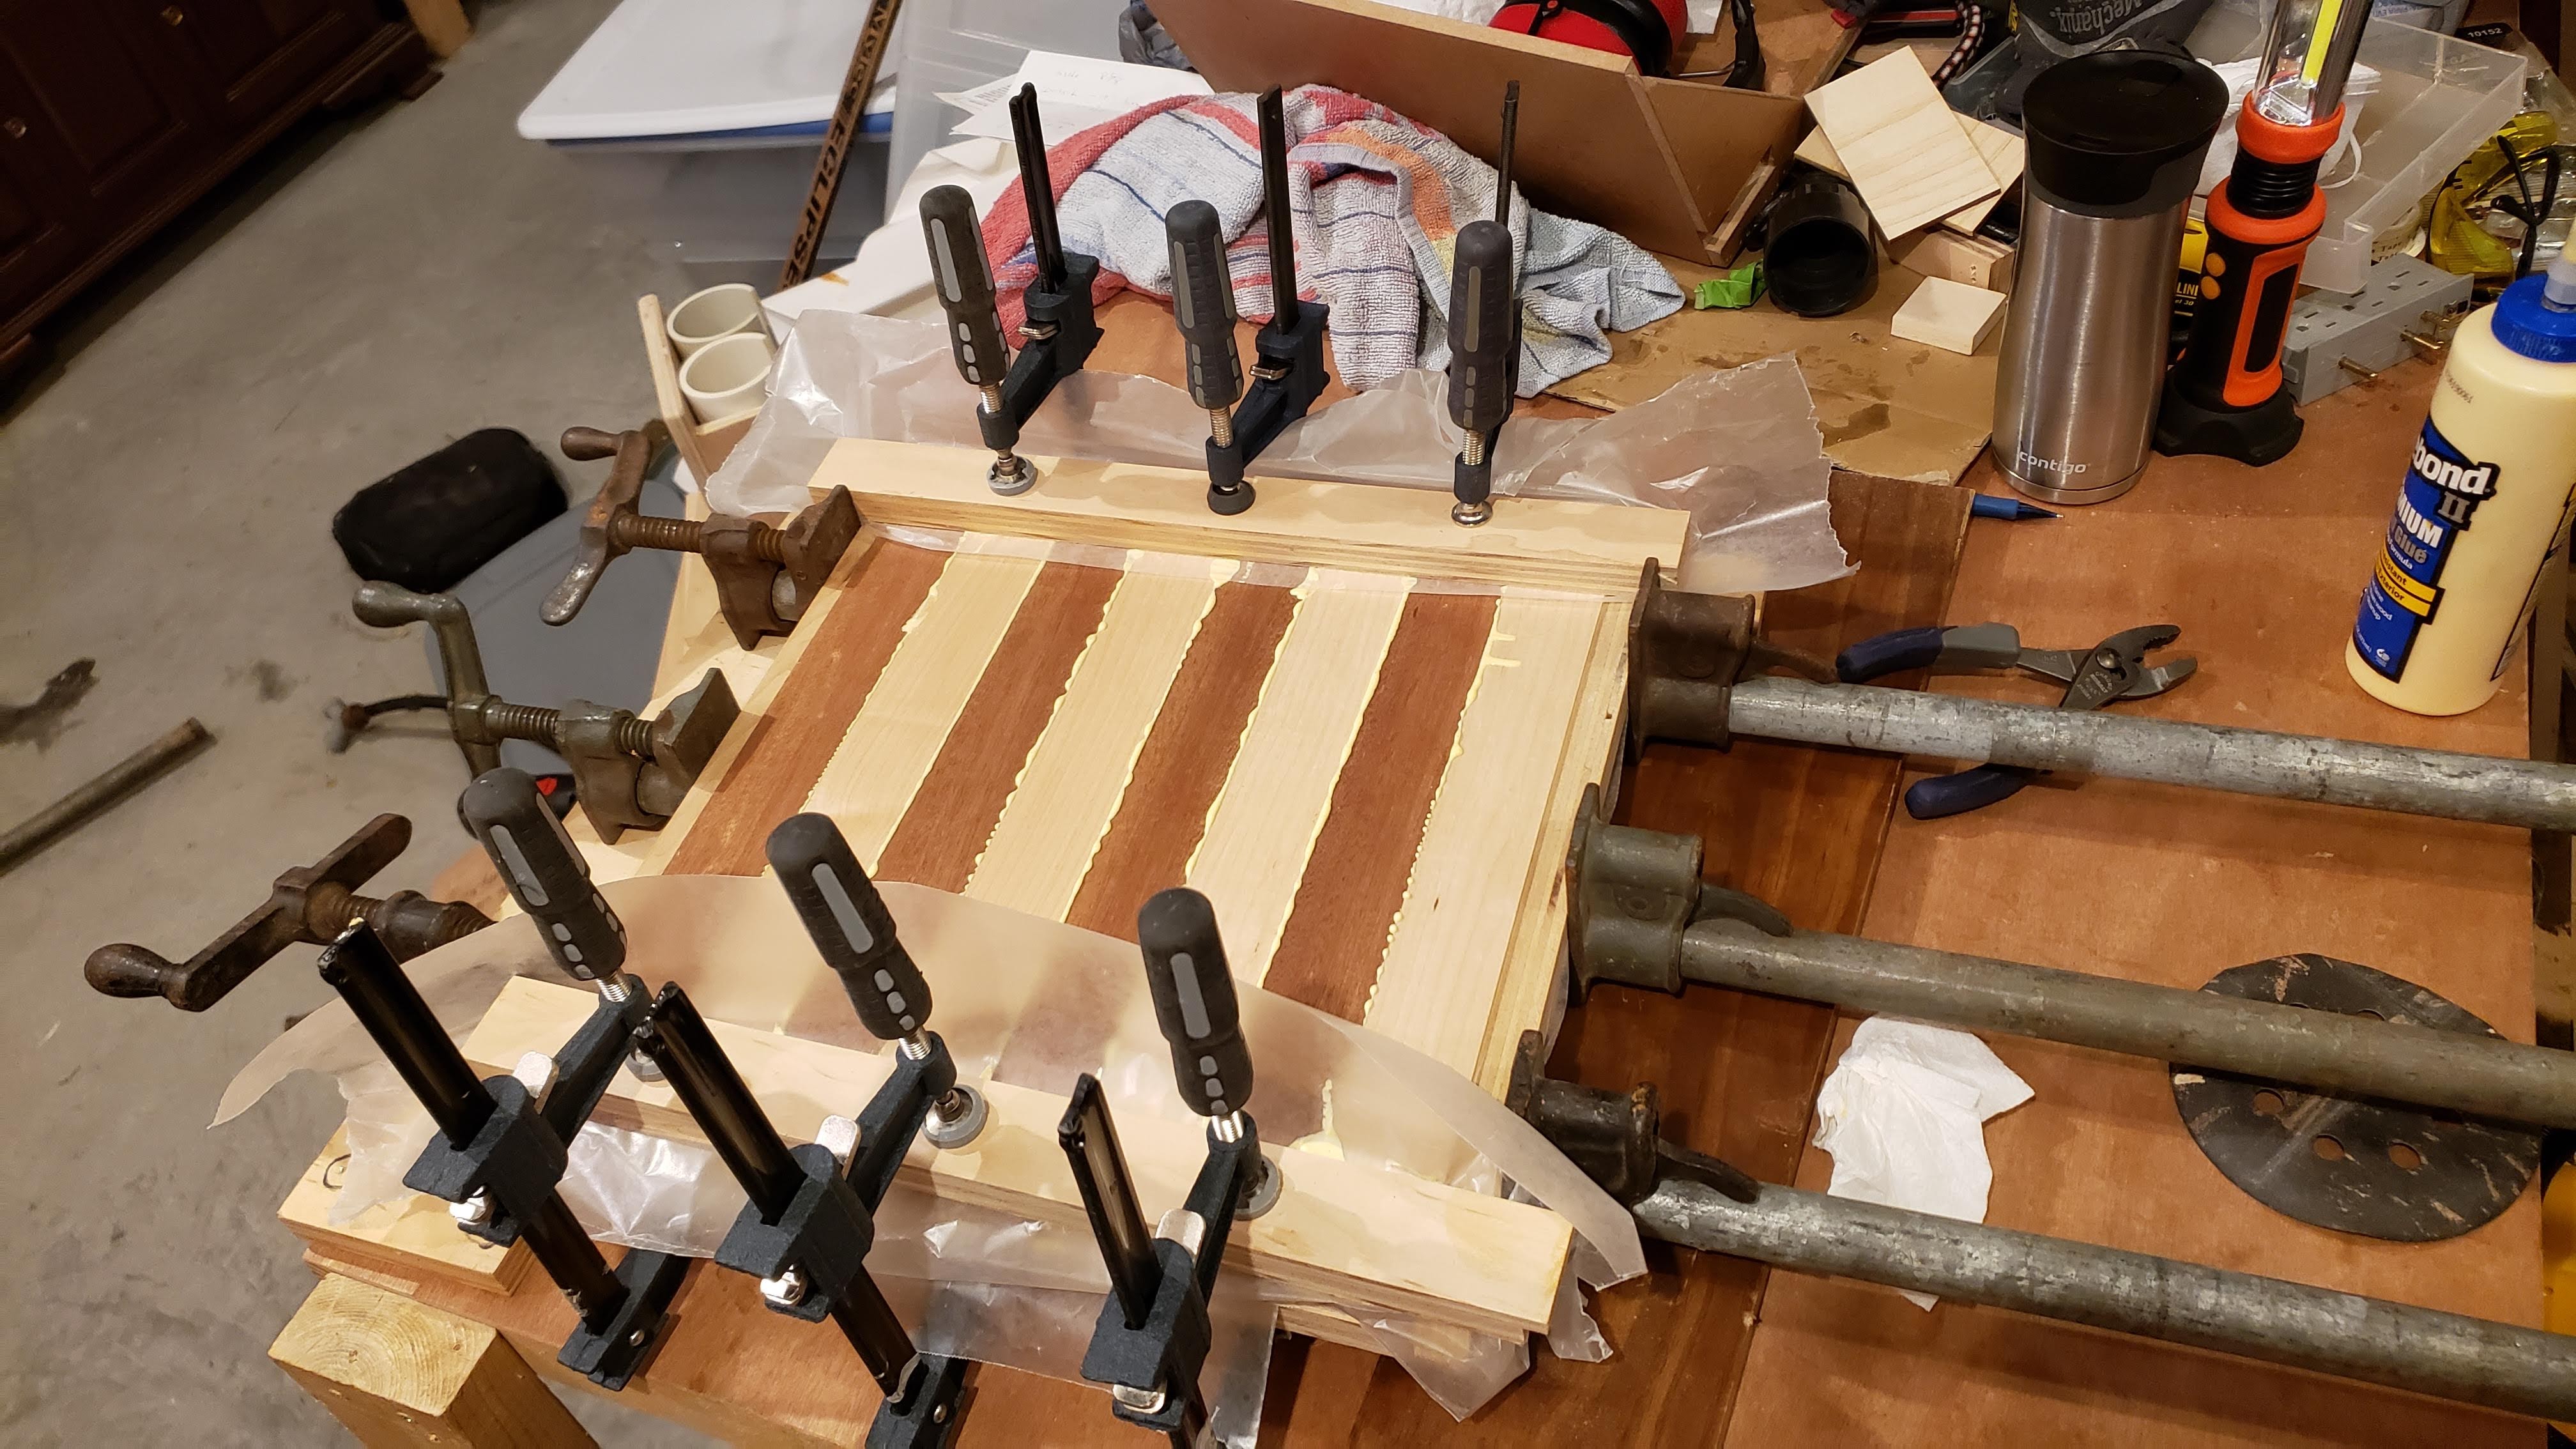

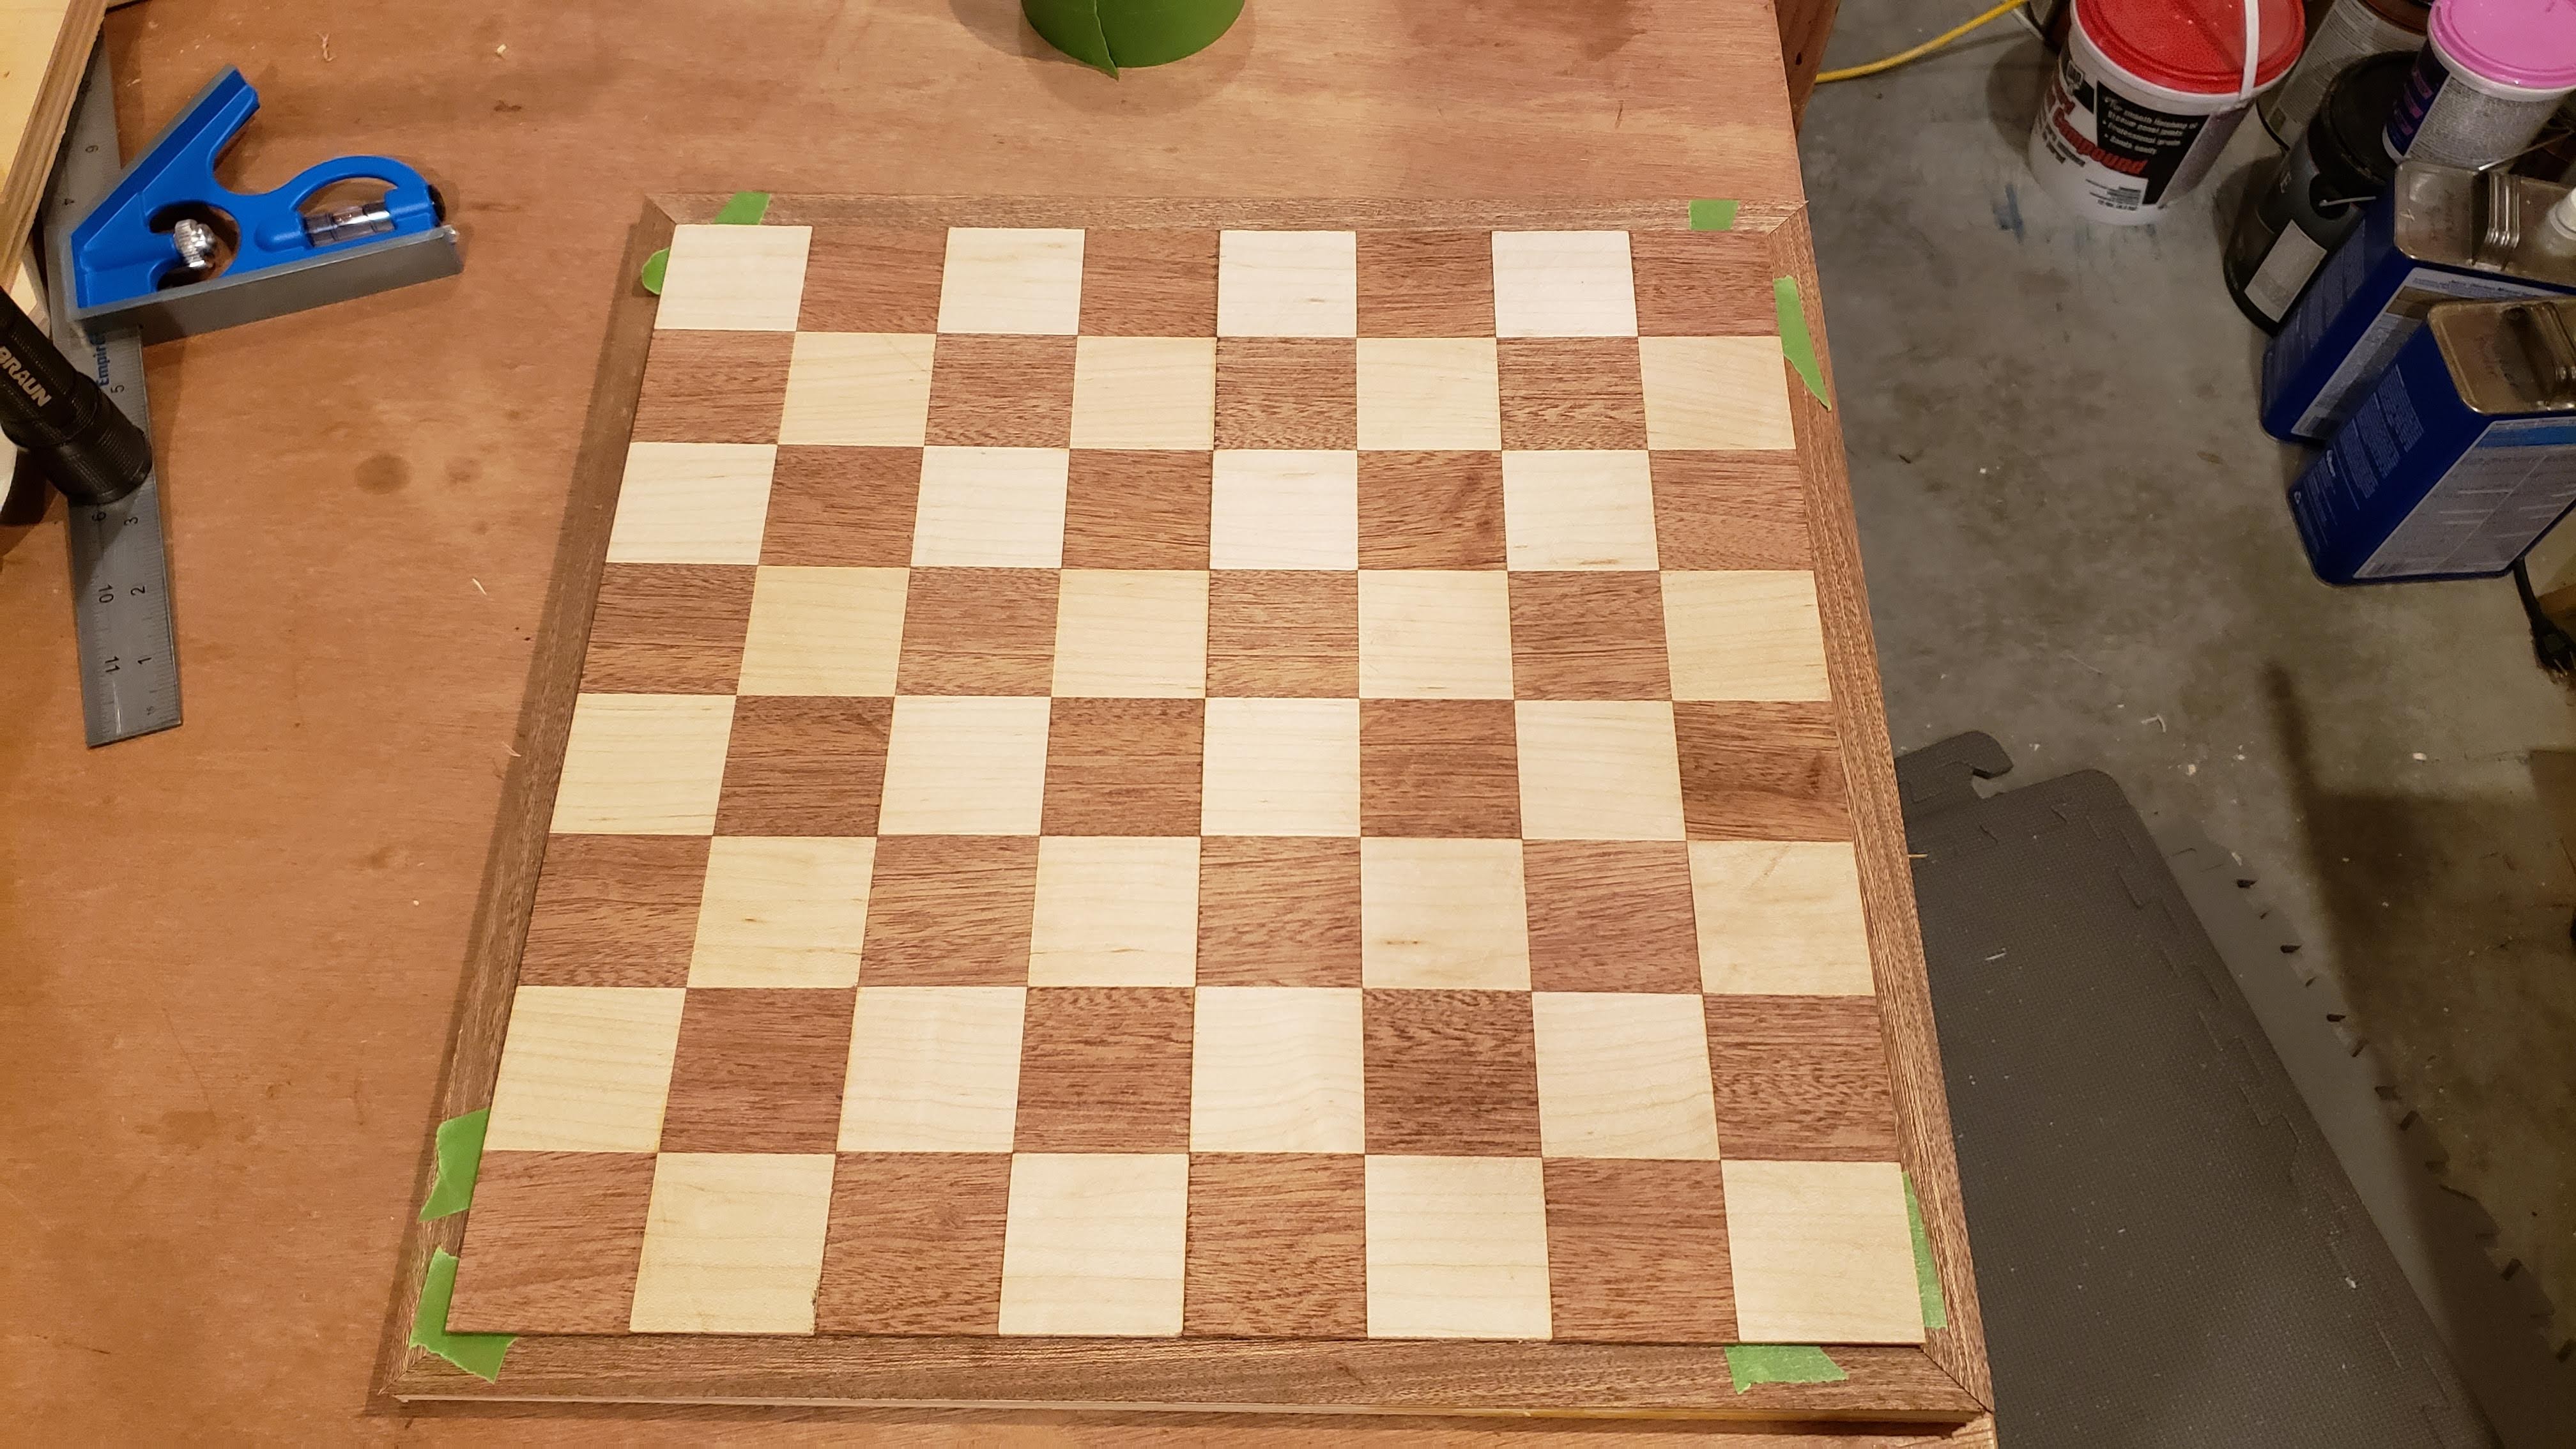
The next step was to take each of those strips and slice off 1/8 inch thick strips to use for the playing field. I didn’t want to use the thick blocks because of concern for wood movement. As it is, I have enough of those blocks left over to make two more chess boards. I then carefully taped strips together on the good side, unfolded enough to put glue in the crease, then laid them flat to let them dry. Essentially used the tape to clamp them for gluing. It actually worked really well to glue up the entire board this way.
It was at this stage that I used the unfinished playing field for a game of chess with my son.


I knew I wanted to have a narrow gap between the playing field and the frame, but I didn’t want the plywood base to be what was seen. So, I trimmed off a very thin layer from the edges of the plywood, cut some thin veneer off of the sapele, mitered those strips, and glued them to the plywood first. Then the playing field would slightly overlap those strips with the rest of the strips being in the dado I would cut in the frame.


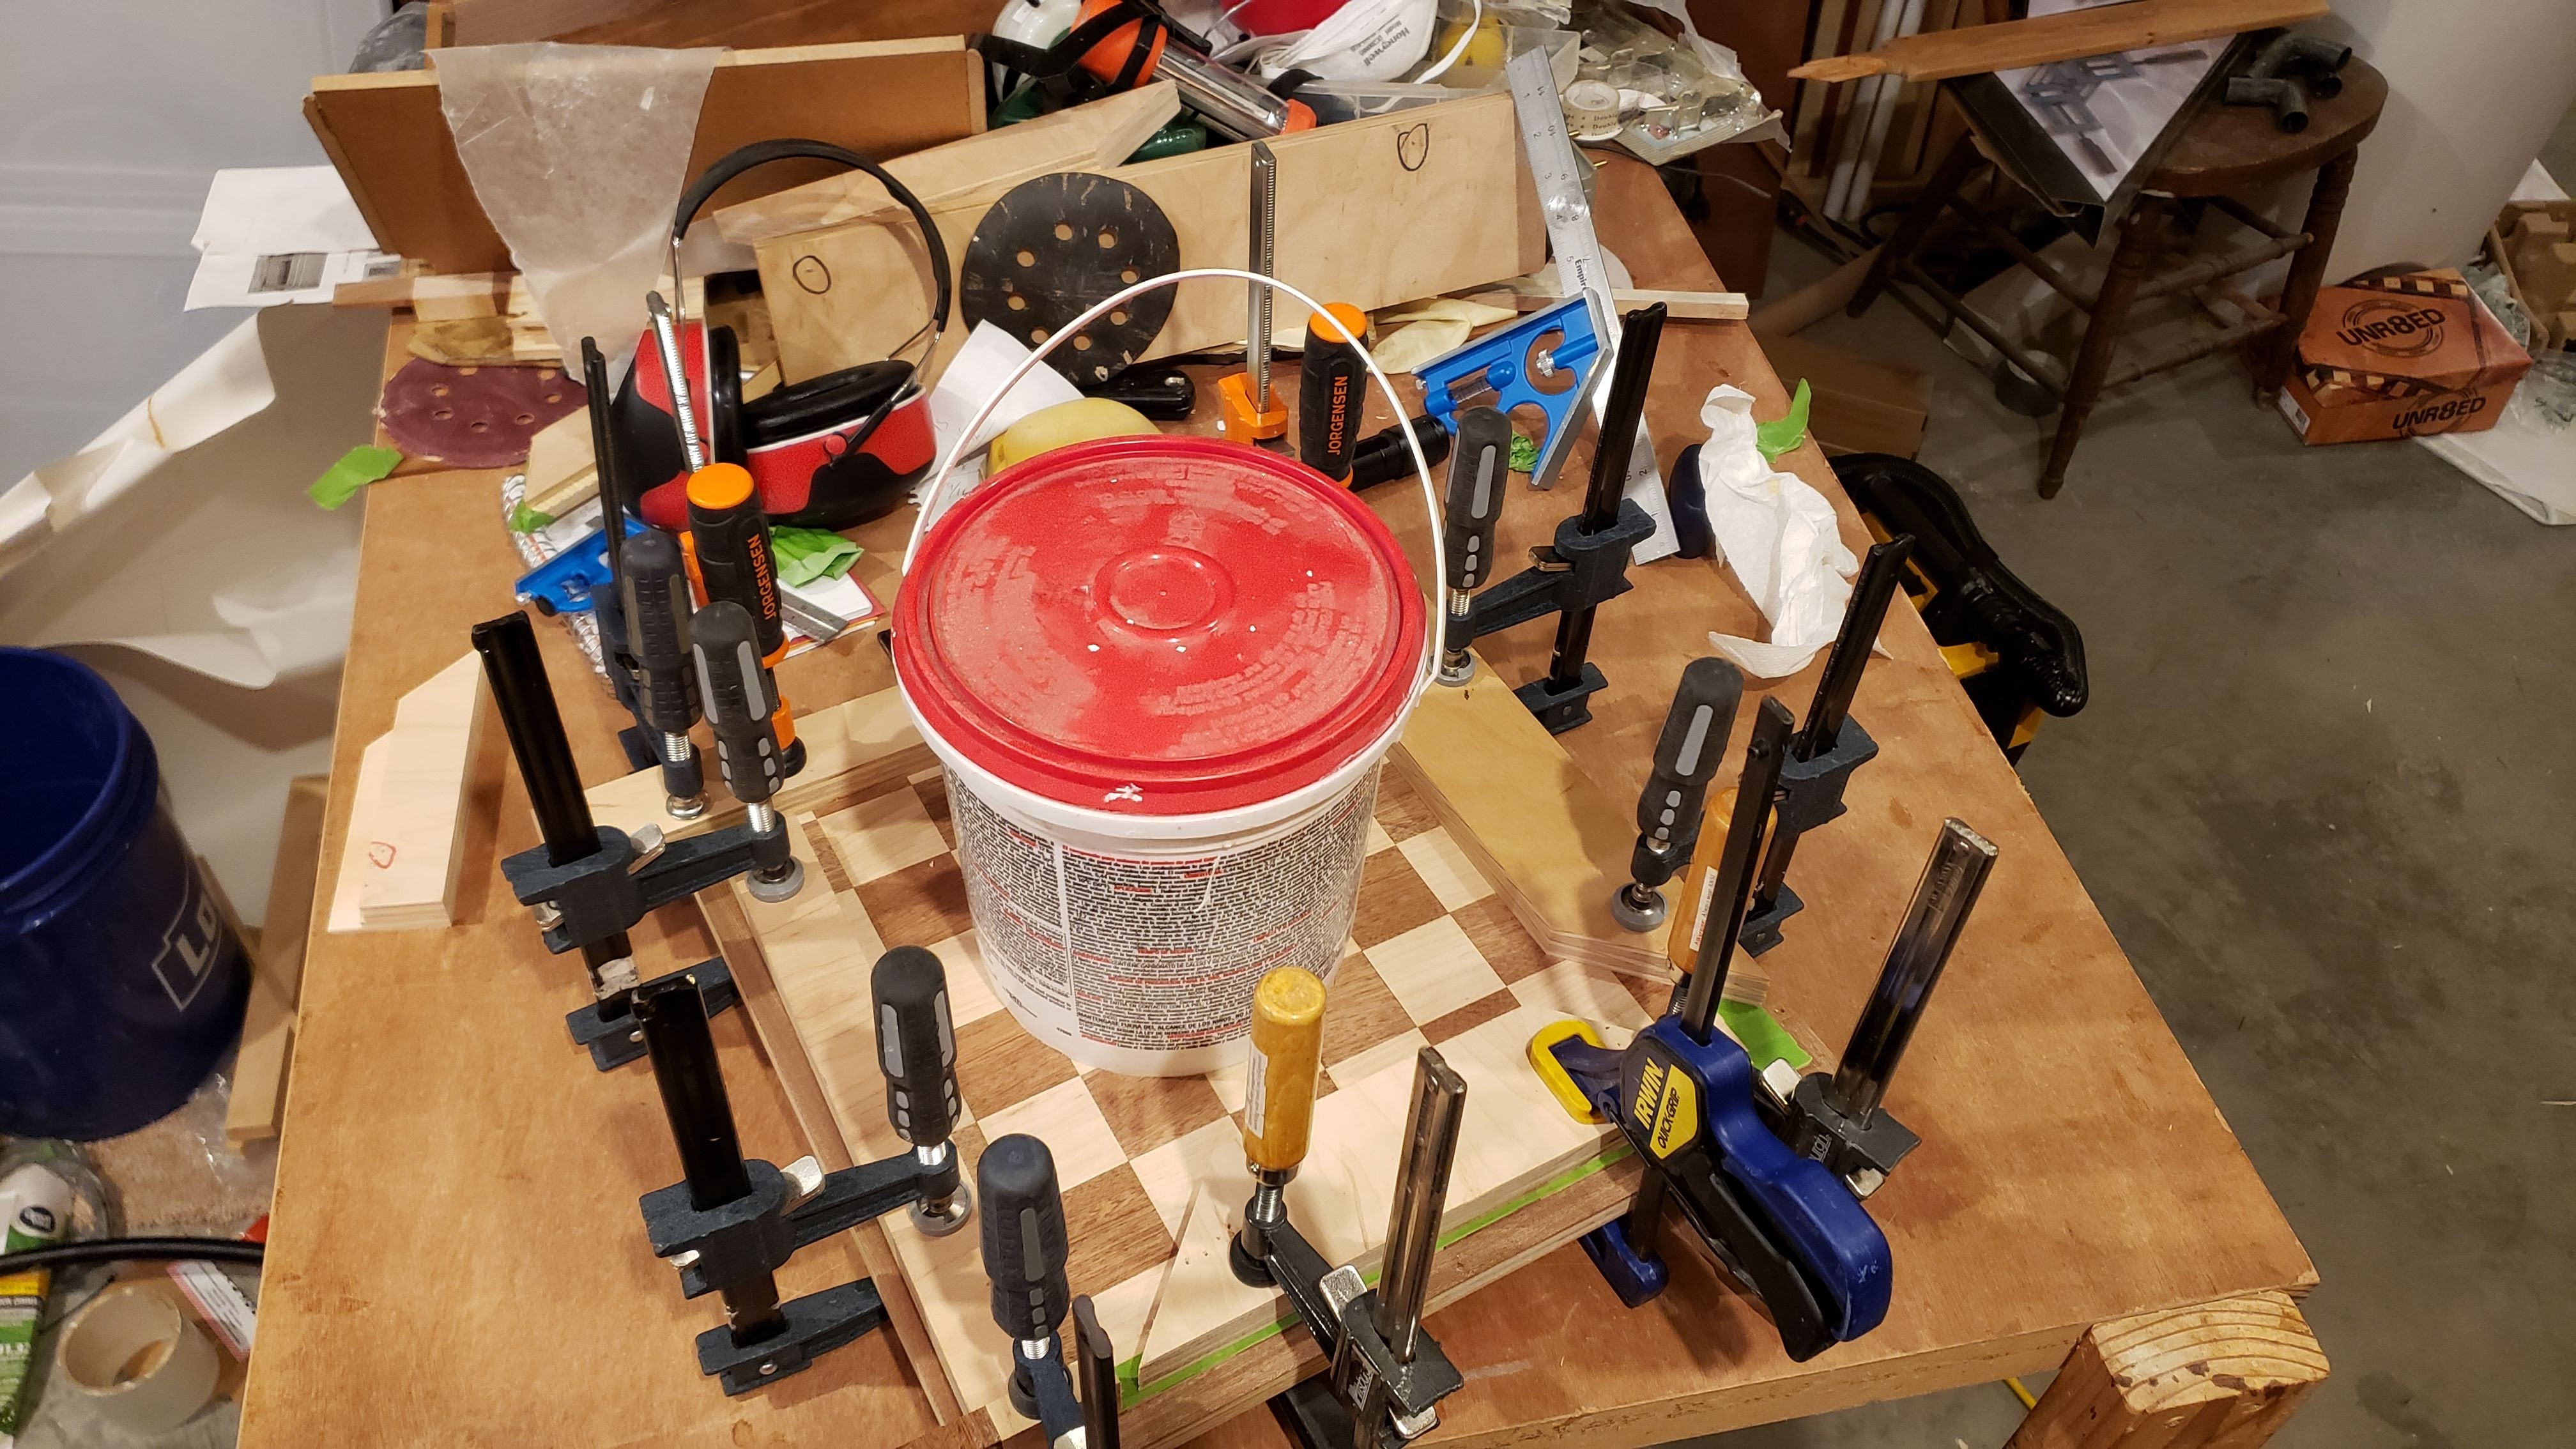
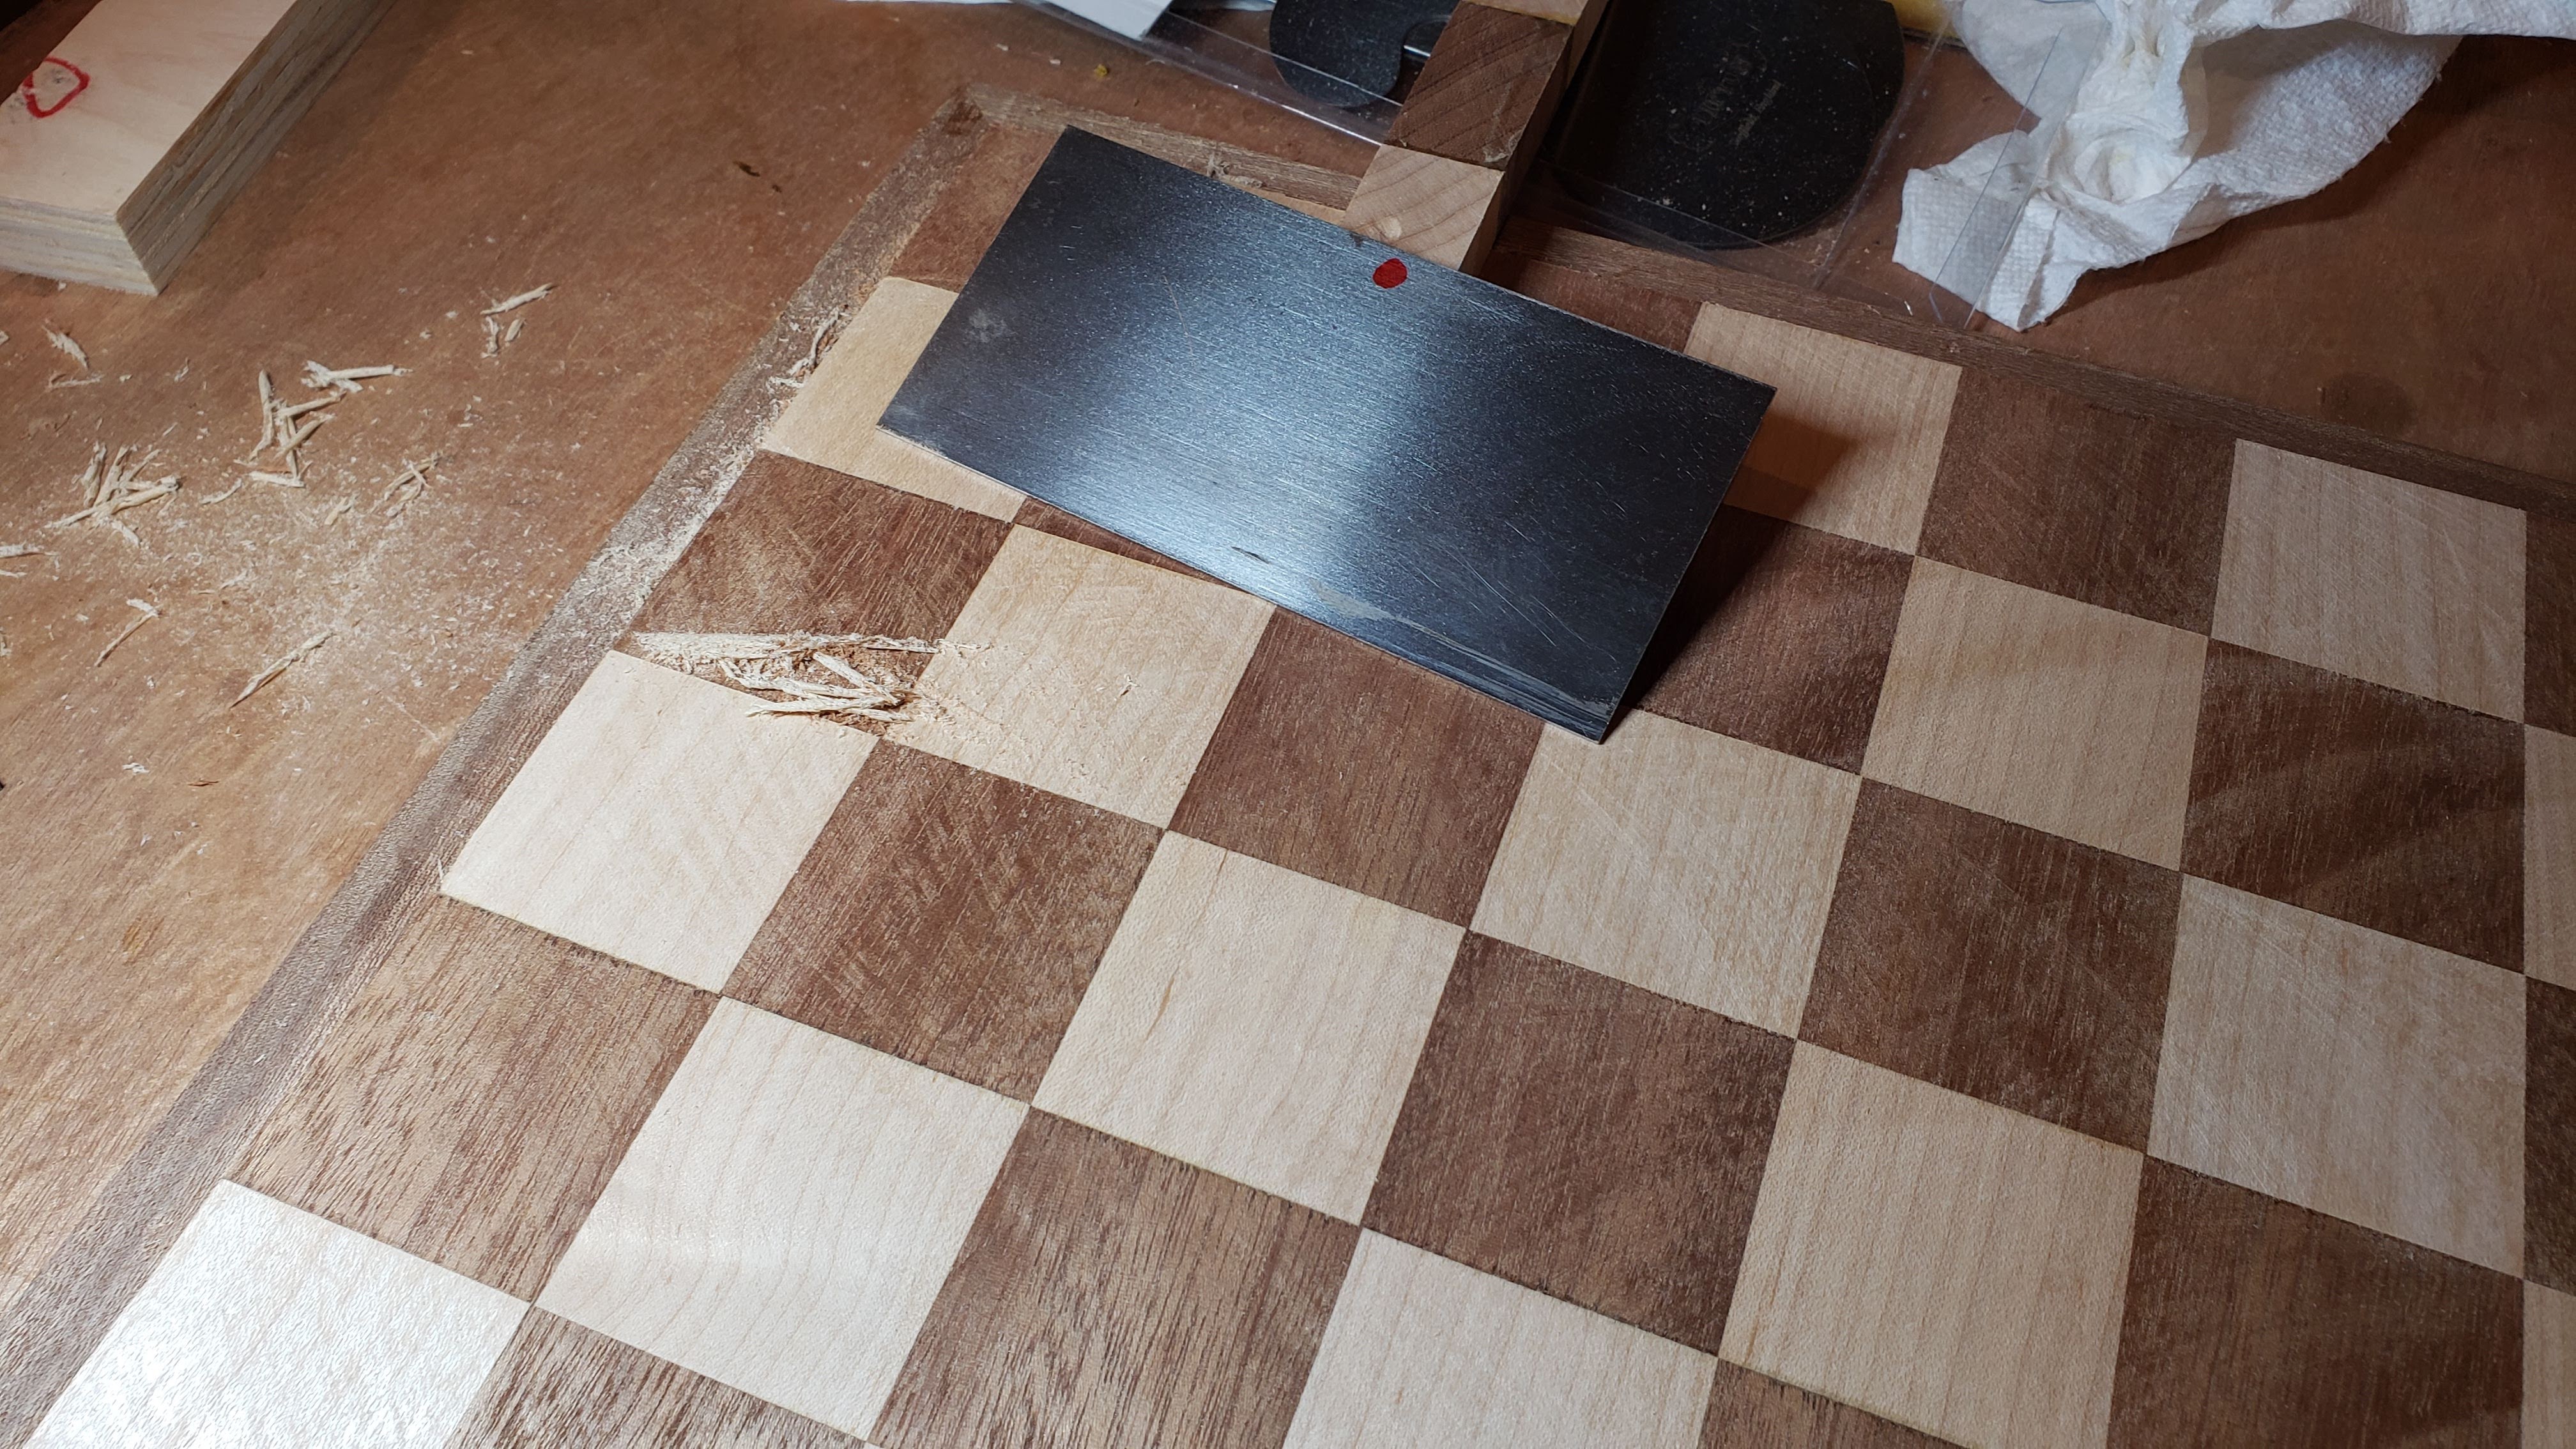
That got me to the point of gluing the playing field to the plywood base. I used a cabinet scraper to level out the slight differences in the squares and get rid of the blade marks. And yeah, I couldn’t resist putting mineral spirits on it to get a look at what it would look like.


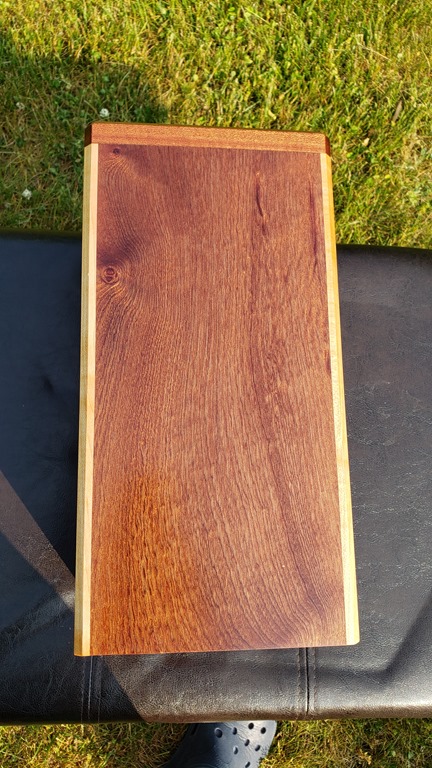
I used my Incra miter gauge to cut the mitered corners for the frame. It took me a while to get it adjusted so that it was square, but once that was done, the angles were spot on.


I then built a spline jig for my table saw. Tested it with some scrap wood before clamping the chess board to it and cutting the spline slots. This is a cut that you get one chance to get right. Cut the splines out of maple and sanded them flush. I forgot to take pictures of the other jig I made to hold the board in place to cut the 10 degree bevels.


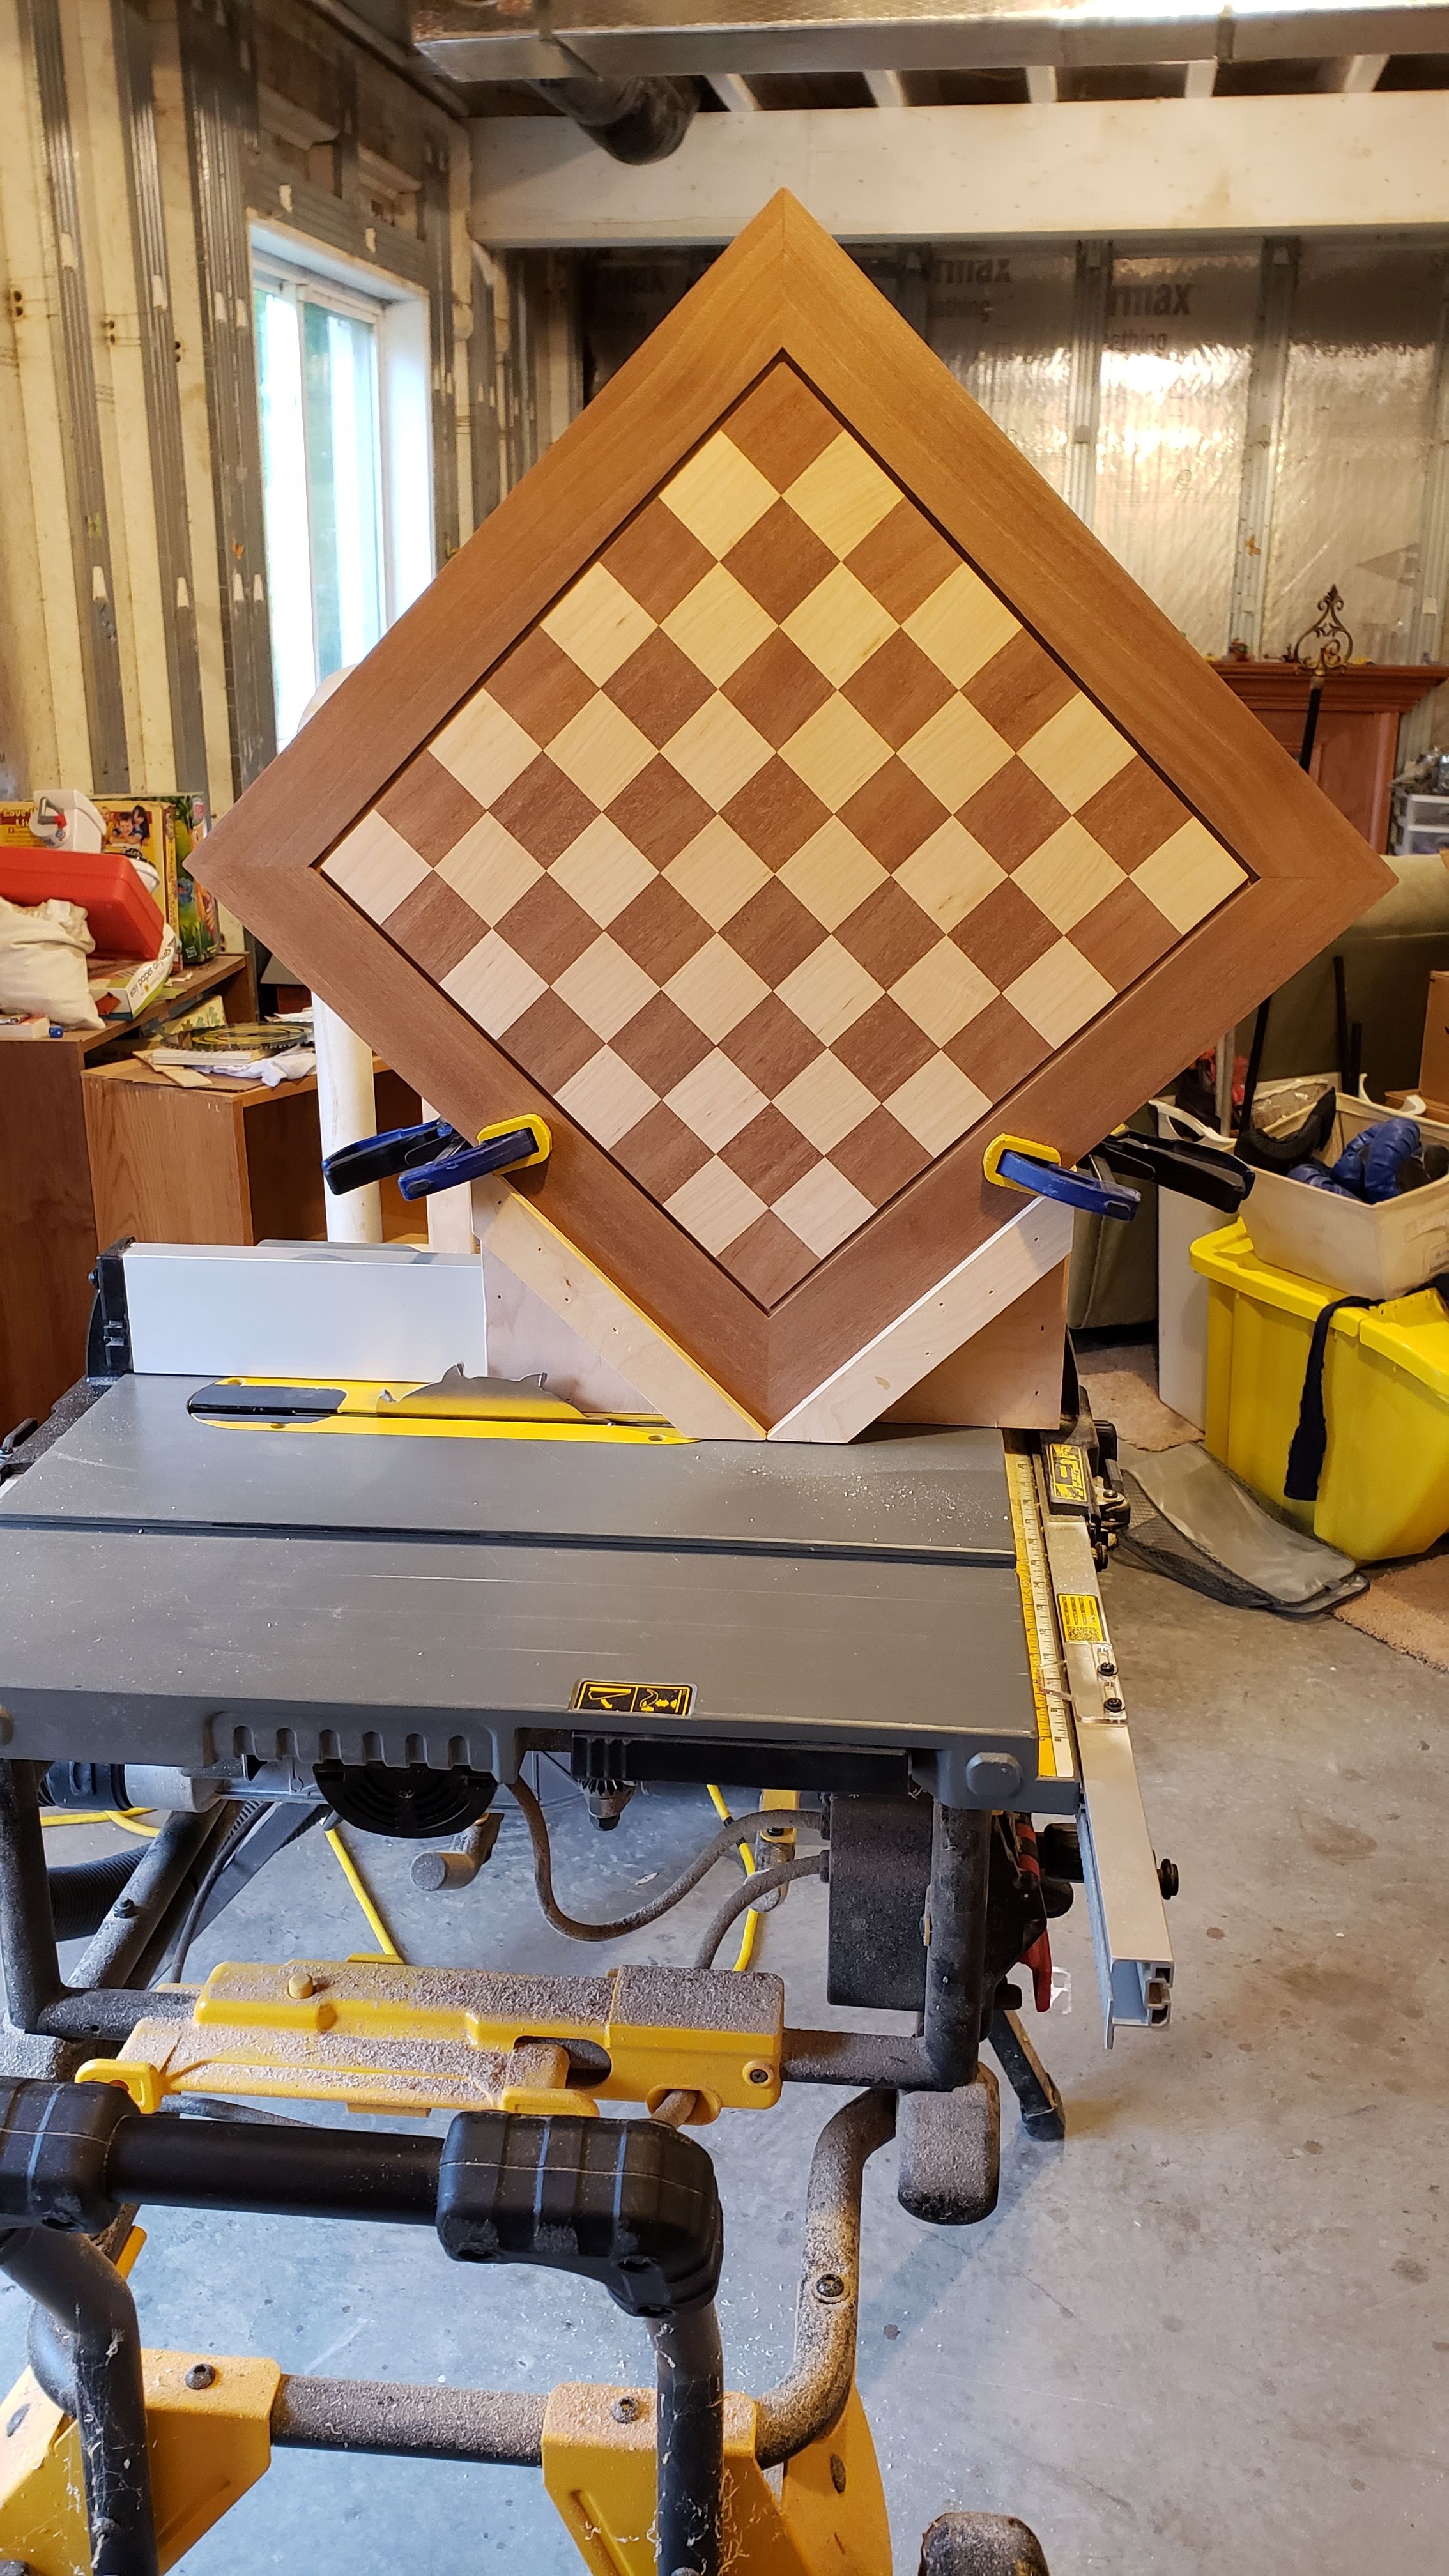


Final result that I’m very happy with. I included a french cleat on the back so I could hang it on the wall.


An urn for my friend
I little over a year ago, a good friend died of cancer. Have you ever had a friend who was always the first one to call you if something was going on in your life? Kerry was that friend to so many people. He would do just about anything for his friends, and he had a LOT of friends. After he passed, I knew he had planned to be cremated. I talked to his wife who is also a very good friend, and offered to make an urn for Kerry if she would like. If she didn’t want that, obviously no problem, but I would be happy to honor my friend by making this. She said yes, and I spent over a year determining the right design for this particular project – to both honor Kerry but also to be something that Jess would appreciate. I wanted the project to reflect some aspects of Kerry.
- Kerry was not a flashy person. Plain is certainly not the right word, but he just wasn’t flashy. This project is not designed to be a focal point. It was designed to have the ability to go unnoticed if desired/needed.
- Kerry was also strong. Our community is poorer with his absence. Because of that, I wanted this project to be strong and well made.
- Kerry’s heart was beautiful. He deeply cared for people, and you knew it. So, while this is not designed to be a focal point, it did need to be beautiful.
Here is a video of the finished urn. Below the video is a writeup of the design and build process with pictures, starting from the SketchUp design to completed build.
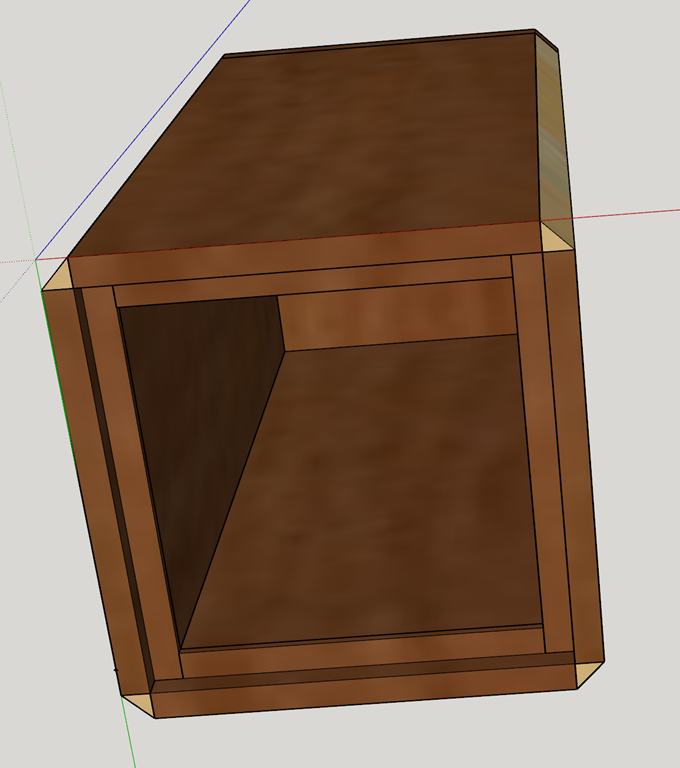
For most of my woodworking projects, I will start by doing a 3D design (with all cuts/joints) in SketchUp. I used SketchUp to design a couple of ideas that I ended up not using before finally getting the right idea for both Kerry and Jess. Here is the design as drawn up in SketchUp.


I started out the some 4/4 sapele for the main body, and I had plenty of maple left over from other projects for the corners. I had never worked with sapele before, but I will definitely use it again. That stuff is amazing. The interlocking grain is almost iridescent with the way it shimmers and changes when you view it at different angles in the light. Here are some pictures of the build process along with a video that attempts to show the beauty of the wood. The closest you get to seeing the true beauty in the video is actually when viewing the bottom. The board on the right in the picture below is the sapele. I also had some walnut that I was planing at the same time. I originally considered making the corners with the walnut, but decided on the contrast with the maple instead.


The cuts for this project were actually really easy. Just a matter of setting the table saw fence and blade height to 7/16 (half the thickness of the planed lumber). The design of the joints meant that the even pressure of the bungee cords would pull all of the joints in tight and perfectly square. The joints were designed to leave a 7/16 square out of outside of each corner that I could then glue the maple into.


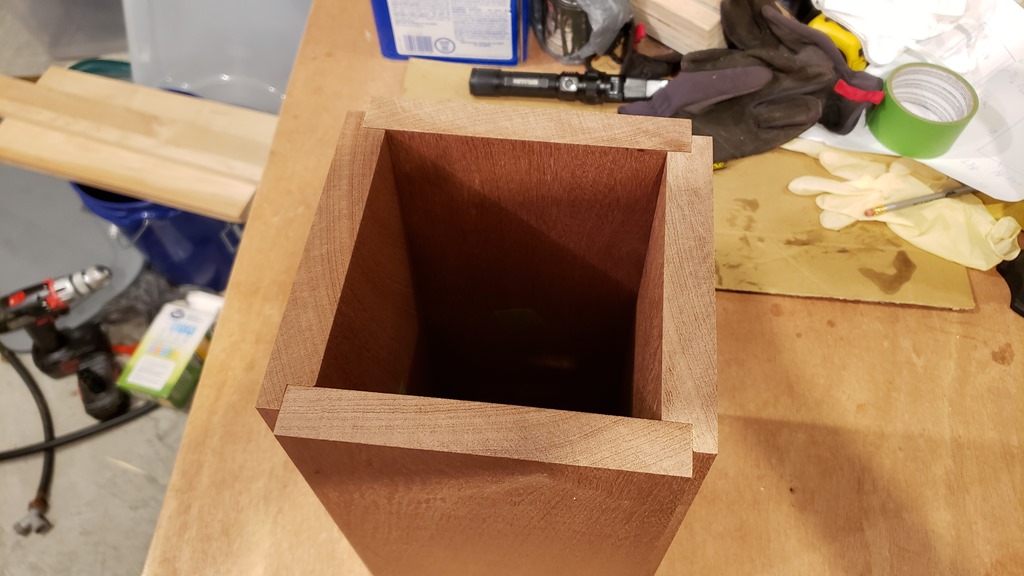

I cut the maple corners slightly larger than needed for the corners and used a flush trim router bit to get them perfectly flush with the box. Again, I used both clamps and a bungee cord to pull them in tight for gluing.
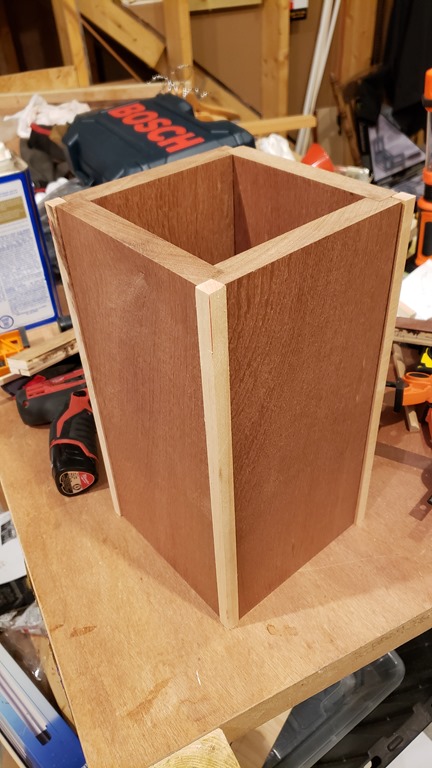


Got the top glued on with multiple clamps. If I had it to do over again, I would have cut the top slightly larger to make it easier to glue up. After the glue was dry, I used the flush trim bit again. I clamped it to the side of my vacuum cart to make it easy to get all sides of the top trimmed.


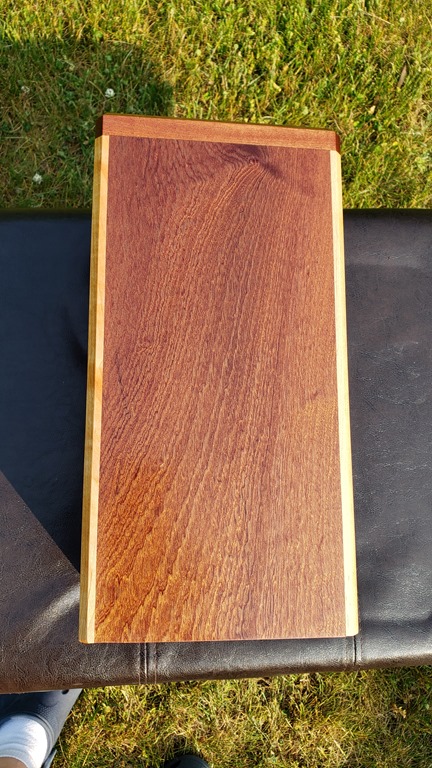
Last part was to use a chamfer bit on all corners and sand it smooth down to 800 grit. I couldn’t help but to wipe it down with mineral spirits to give me an idea of what it was going to look like when it was finished. I also made a quick platform to hold it for drying when I applied the finish. The finish started with a coat of boiled linseed oil to bring out the depth of grain and color. After that dried, I finished it off with three coats of clear gloss lacquer.


Pictures and video of the final product.


Building a Hammered Dulcimer–Take 2
It’s a little sad that the last time I posted was almost two years ago, and now I’m posting a follow up to that post. When I built the hammered dulcimer a couple of years ago, there was a problem with the instrument that came up shortly after I built it. Basic gist is that the soundboard collapsed due to a structural failure. I combined two different sets of plans when I made that dulcimer. One of the plans said you could get good sound using 1/4 inch plywood for the soundboard, so I used that. What I failed to note was that the internal bracing for that set of plans was different from the bracing that I used from the other set of plans. The end result is that there wasn’t proper bracing beneath the bass bridge, the soundboard collapsed, and there was no way to salvage the instrument. I had spent too much time on it at the time to even think about rebuilding from scratch at that time, so it unfortunately went on the back burner for well over a year.
A few months ago I pulled that project back out and built a new hammered dulcimer for my daughter. It went much faster the second time around because I had learned a lot from the first time, and I have gotten better at woodworking since then.
Here are a few pictures of the end result. I am very pleased with how it turned out. In a nutshell, this is the most beautiful thing I have ever built from wood, and there isn’t a close second. There is a video below of me talking about the instrument and playing a couple of short segments (the beginning of Ode to Joy and the intro to Creed by Rich Mullins). No, I don’t actually know how to play it, but I can learn just enough to at least vaguely sound like the song.
The frame and internal bracing are all made from hard maple. The soundboard is mahogany, and the bridges and side pieces are from purpleheart. And yes, purpleheart is naturally purple. The whole thing got a thin coat of boiled linseed oil followed by multiple coats of lacquer.


Subscribe
Recent Comments
-

