An urn for my friend
I little over a year ago, a good friend died of cancer. Have you ever had a friend who was always the first one to call you if something was going on in your life? Kerry was that friend to so many people. He would do just about anything for his friends, and he had a LOT of friends. After he passed, I knew he had planned to be cremated. I talked to his wife who is also a very good friend, and offered to make an urn for Kerry if she would like. If she didn’t want that, obviously no problem, but I would be happy to honor my friend by making this. She said yes, and I spent over a year determining the right design for this particular project – to both honor Kerry but also to be something that Jess would appreciate. I wanted the project to reflect some aspects of Kerry.
- Kerry was not a flashy person. Plain is certainly not the right word, but he just wasn’t flashy. This project is not designed to be a focal point. It was designed to have the ability to go unnoticed if desired/needed.
- Kerry was also strong. Our community is poorer with his absence. Because of that, I wanted this project to be strong and well made.
- Kerry’s heart was beautiful. He deeply cared for people, and you knew it. So, while this is not designed to be a focal point, it did need to be beautiful.
Here is a video of the finished urn. Below the video is a writeup of the design and build process with pictures, starting from the SketchUp design to completed build.
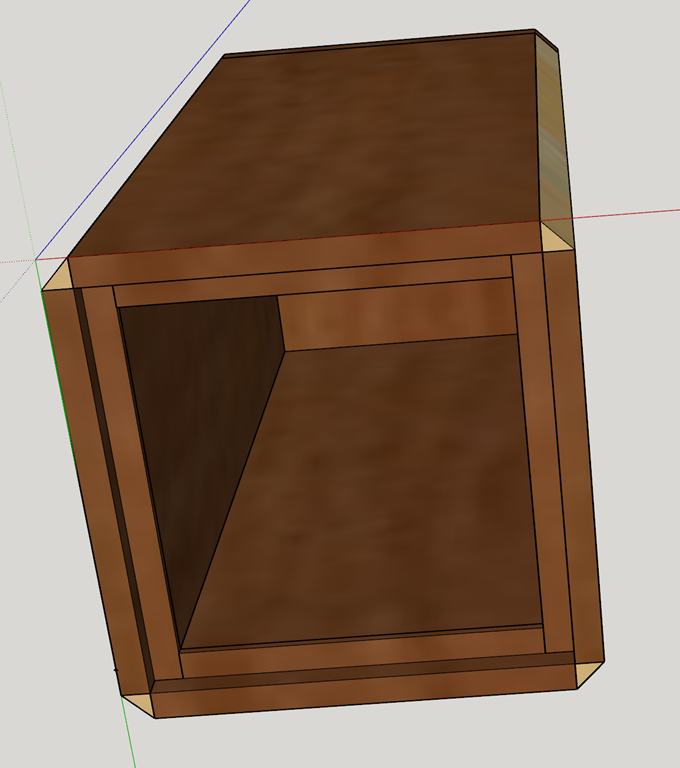
For most of my woodworking projects, I will start by doing a 3D design (with all cuts/joints) in SketchUp. I used SketchUp to design a couple of ideas that I ended up not using before finally getting the right idea for both Kerry and Jess. Here is the design as drawn up in SketchUp.


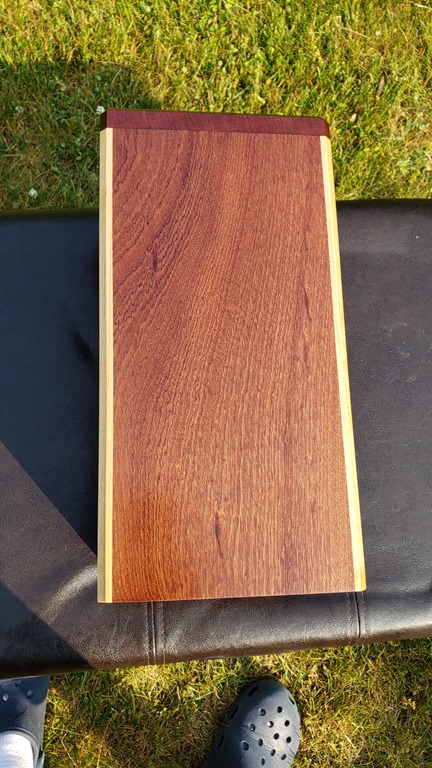
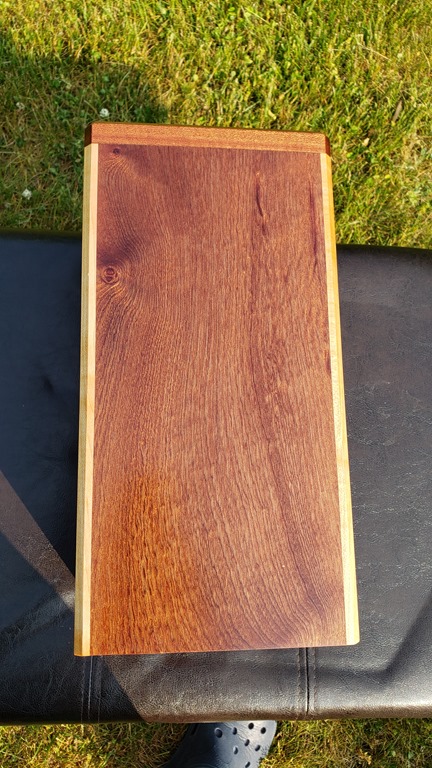
I started out the some 4/4 sapele for the main body, and I had plenty of maple left over from other projects for the corners. I had never worked with sapele before, but I will definitely use it again. That stuff is amazing. The interlocking grain is almost iridescent with the way it shimmers and changes when you view it at different angles in the light. Here are some pictures of the build process along with a video that attempts to show the beauty of the wood. The closest you get to seeing the true beauty in the video is actually when viewing the bottom. The board on the right in the picture below is the sapele. I also had some walnut that I was planing at the same time. I originally considered making the corners with the walnut, but decided on the contrast with the maple instead.


The cuts for this project were actually really easy. Just a matter of setting the table saw fence and blade height to 7/16 (half the thickness of the planed lumber). The design of the joints meant that the even pressure of the bungee cords would pull all of the joints in tight and perfectly square. The joints were designed to leave a 7/16 square out of outside of each corner that I could then glue the maple into.


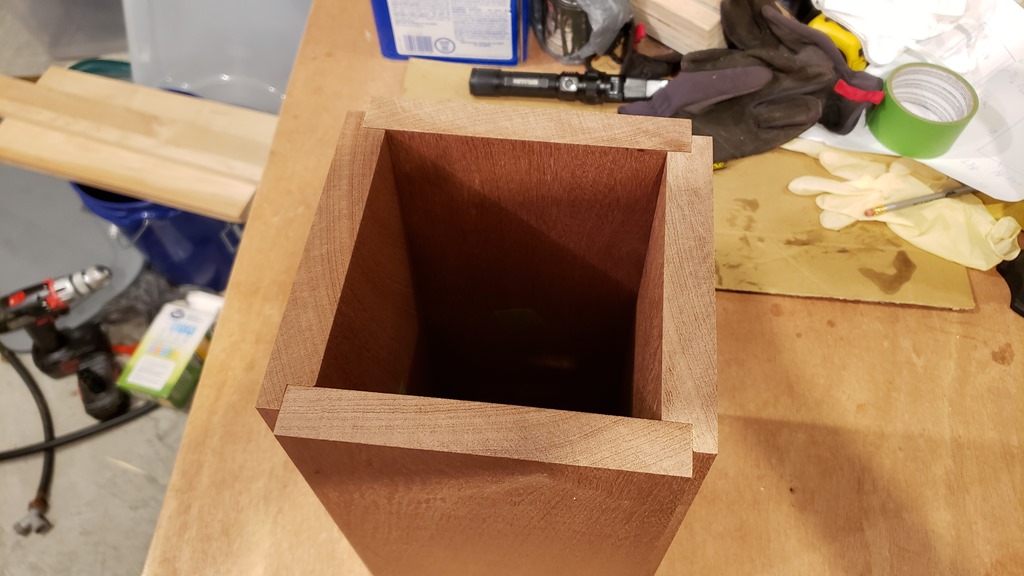

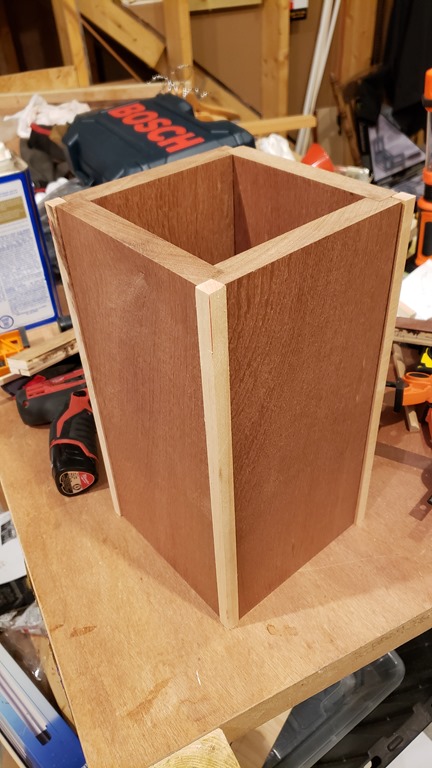
I cut the maple corners slightly larger than needed for the corners and used a flush trim router bit to get them perfectly flush with the box. Again, I used both clamps and a bungee cord to pull them in tight for gluing.


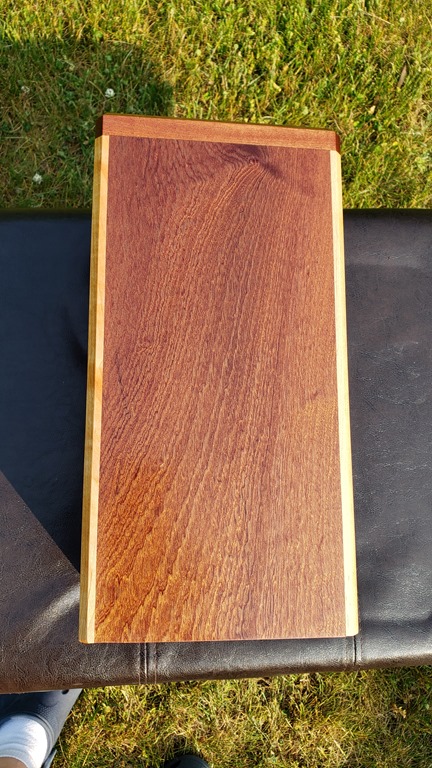
Got the top glued on with multiple clamps. If I had it to do over again, I would have cut the top slightly larger to make it easier to glue up. After the glue was dry, I used the flush trim bit again. I clamped it to the side of my vacuum cart to make it easy to get all sides of the top trimmed.


Last part was to use a chamfer bit on all corners and sand it smooth down to 800 grit. I couldn’t help but to wipe it down with mineral spirits to give me an idea of what it was going to look like when it was finished. I also made a quick platform to hold it for drying when I applied the finish. The finish started with a coat of boiled linseed oil to bring out the depth of grain and color. After that dried, I finished it off with three coats of clear gloss lacquer.


Pictures and video of the final product.


Subscribe
Recent Comments
-

